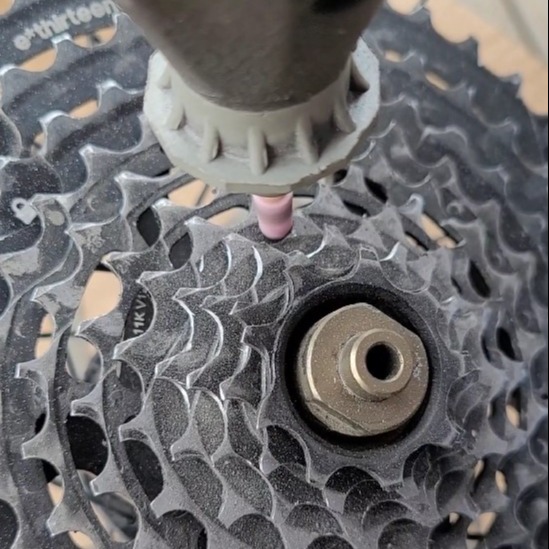
Cassette grinding
Understand cog and chain wear and give your cassette a much longer life.
Sep 2nd, 2026
Understand cog and chain wear and give your cassette a much longer life.
Sep 2nd, 2026
Dentist work
Are you riding your bike(s) a lot? Then you probably know this frustrating moment: you just have put on an new chain, and on the first pedal strokes it hops over with a loud BANG. This will be on the cogs you use the most, so the bike is basically unrideable.
Conventional wisdom tells you a) to exchange the chain well in time and b) replace also the cassette in this case.
Well, true - but in real life you might just not recognize chain wear in time. And cassettes can be quite expensive parts these days, with no exchange possibility of single cogs.
The good news: You can refresh the worn-out cogs in reasonable time (about 5-10 minutes per cog). I did this treatment already dozens of times with good success. It seems that this is not a commonly known thing, so high time to share it here.
Let us look at a real world example. In this case, even the old chain started to jump over under high loads.
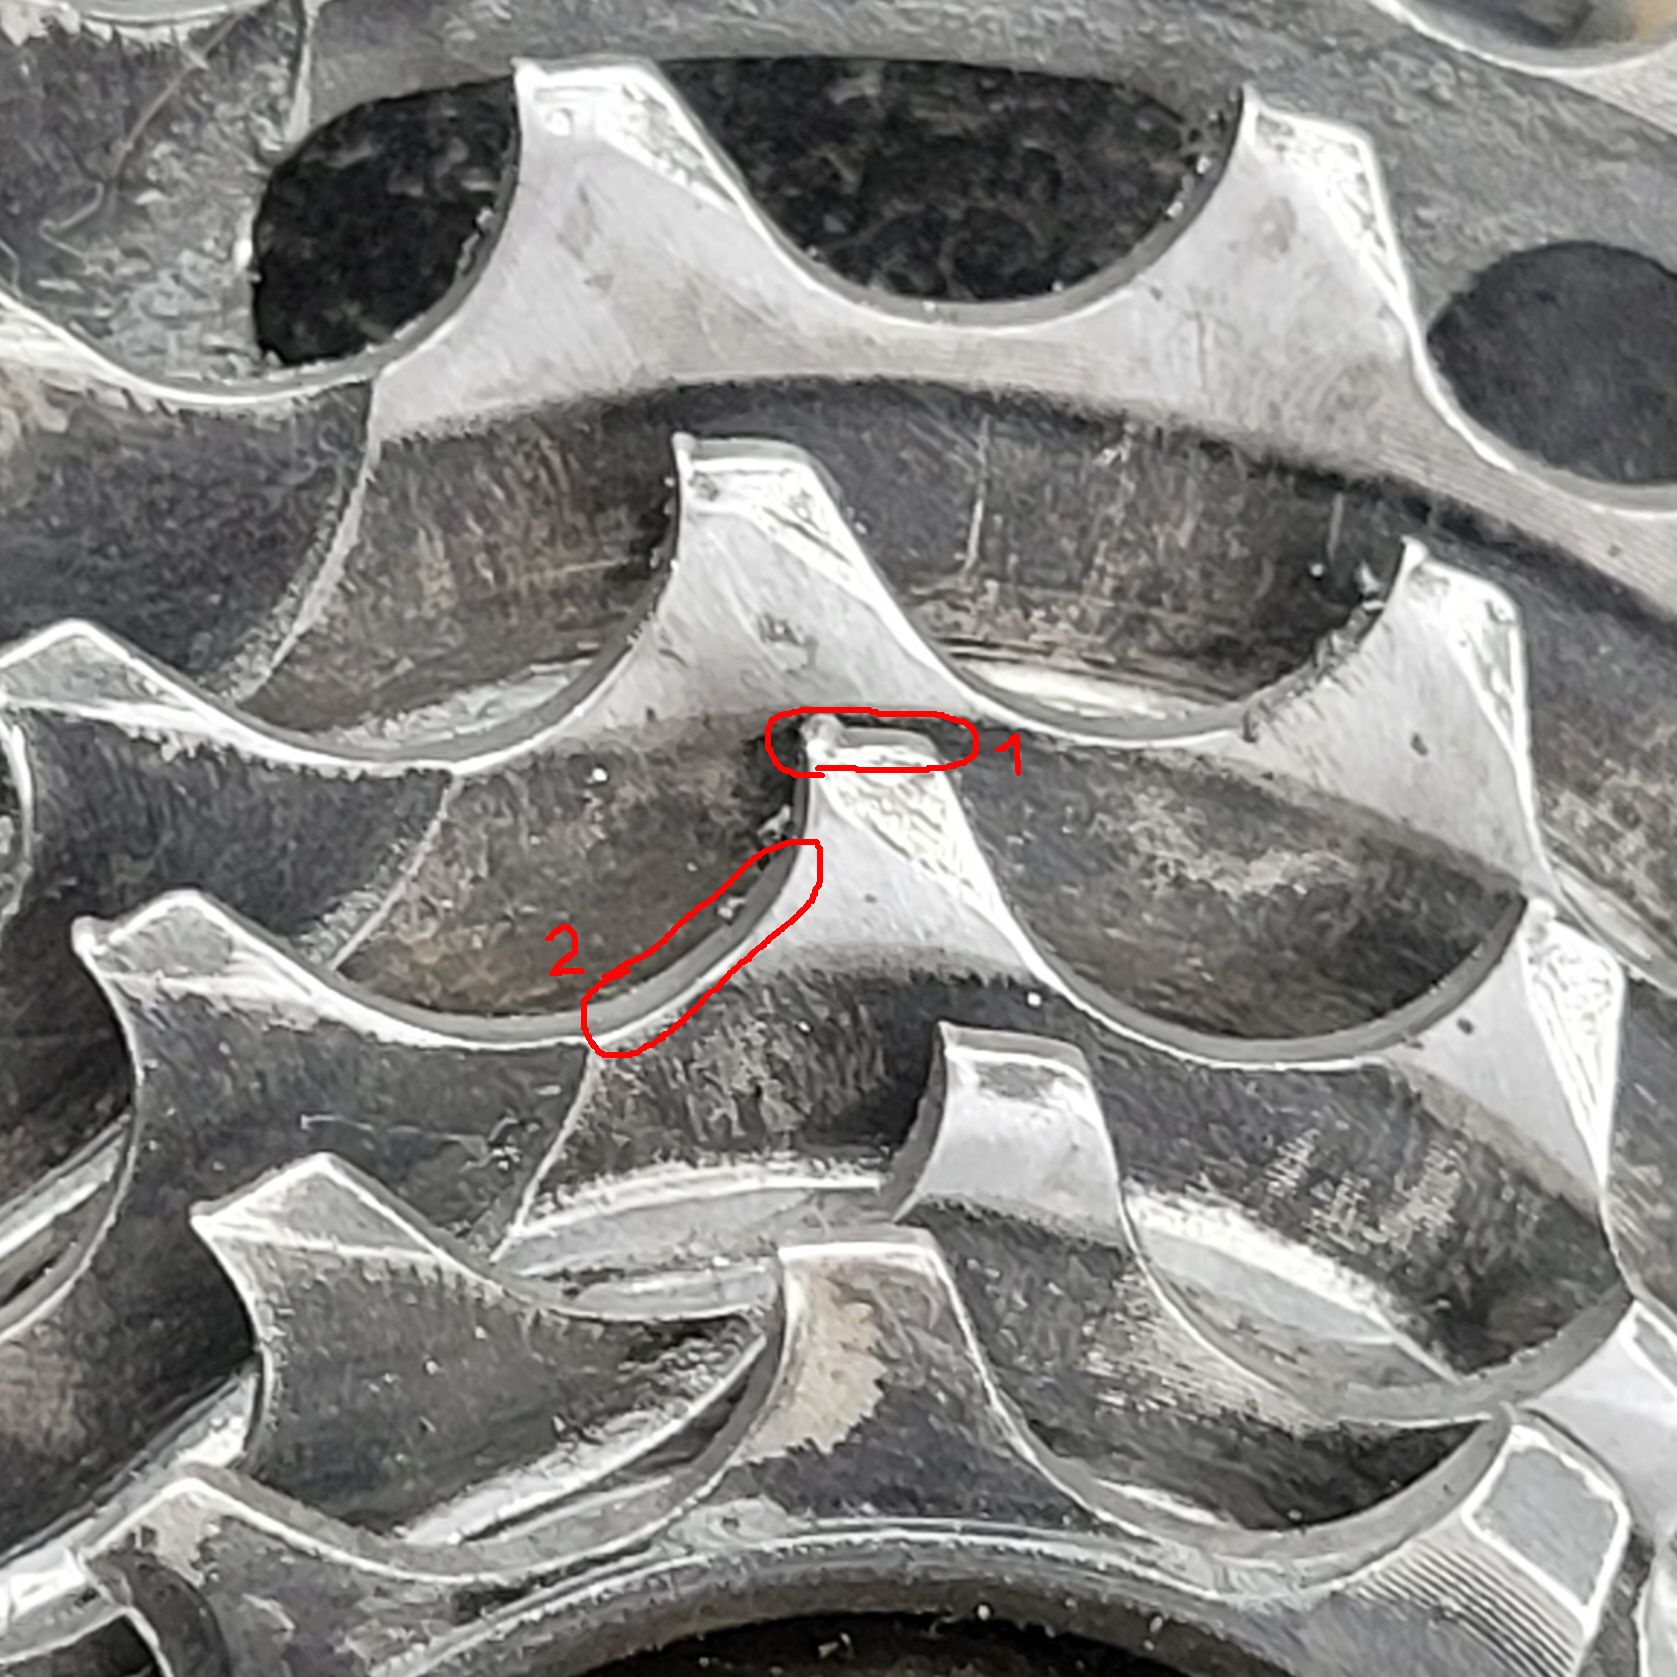
Affected cogs: no. 3 and 4
In this close-up, you can spot the differences in shape:
1. The worn-out cogs have narrower tips of their teeth (you can even see plastic deformation at the load-bearing edge).
2. A "slope" has formed on the load-bearing flanks of the teeth, the original rounded profile has become flatter.
What has happened?
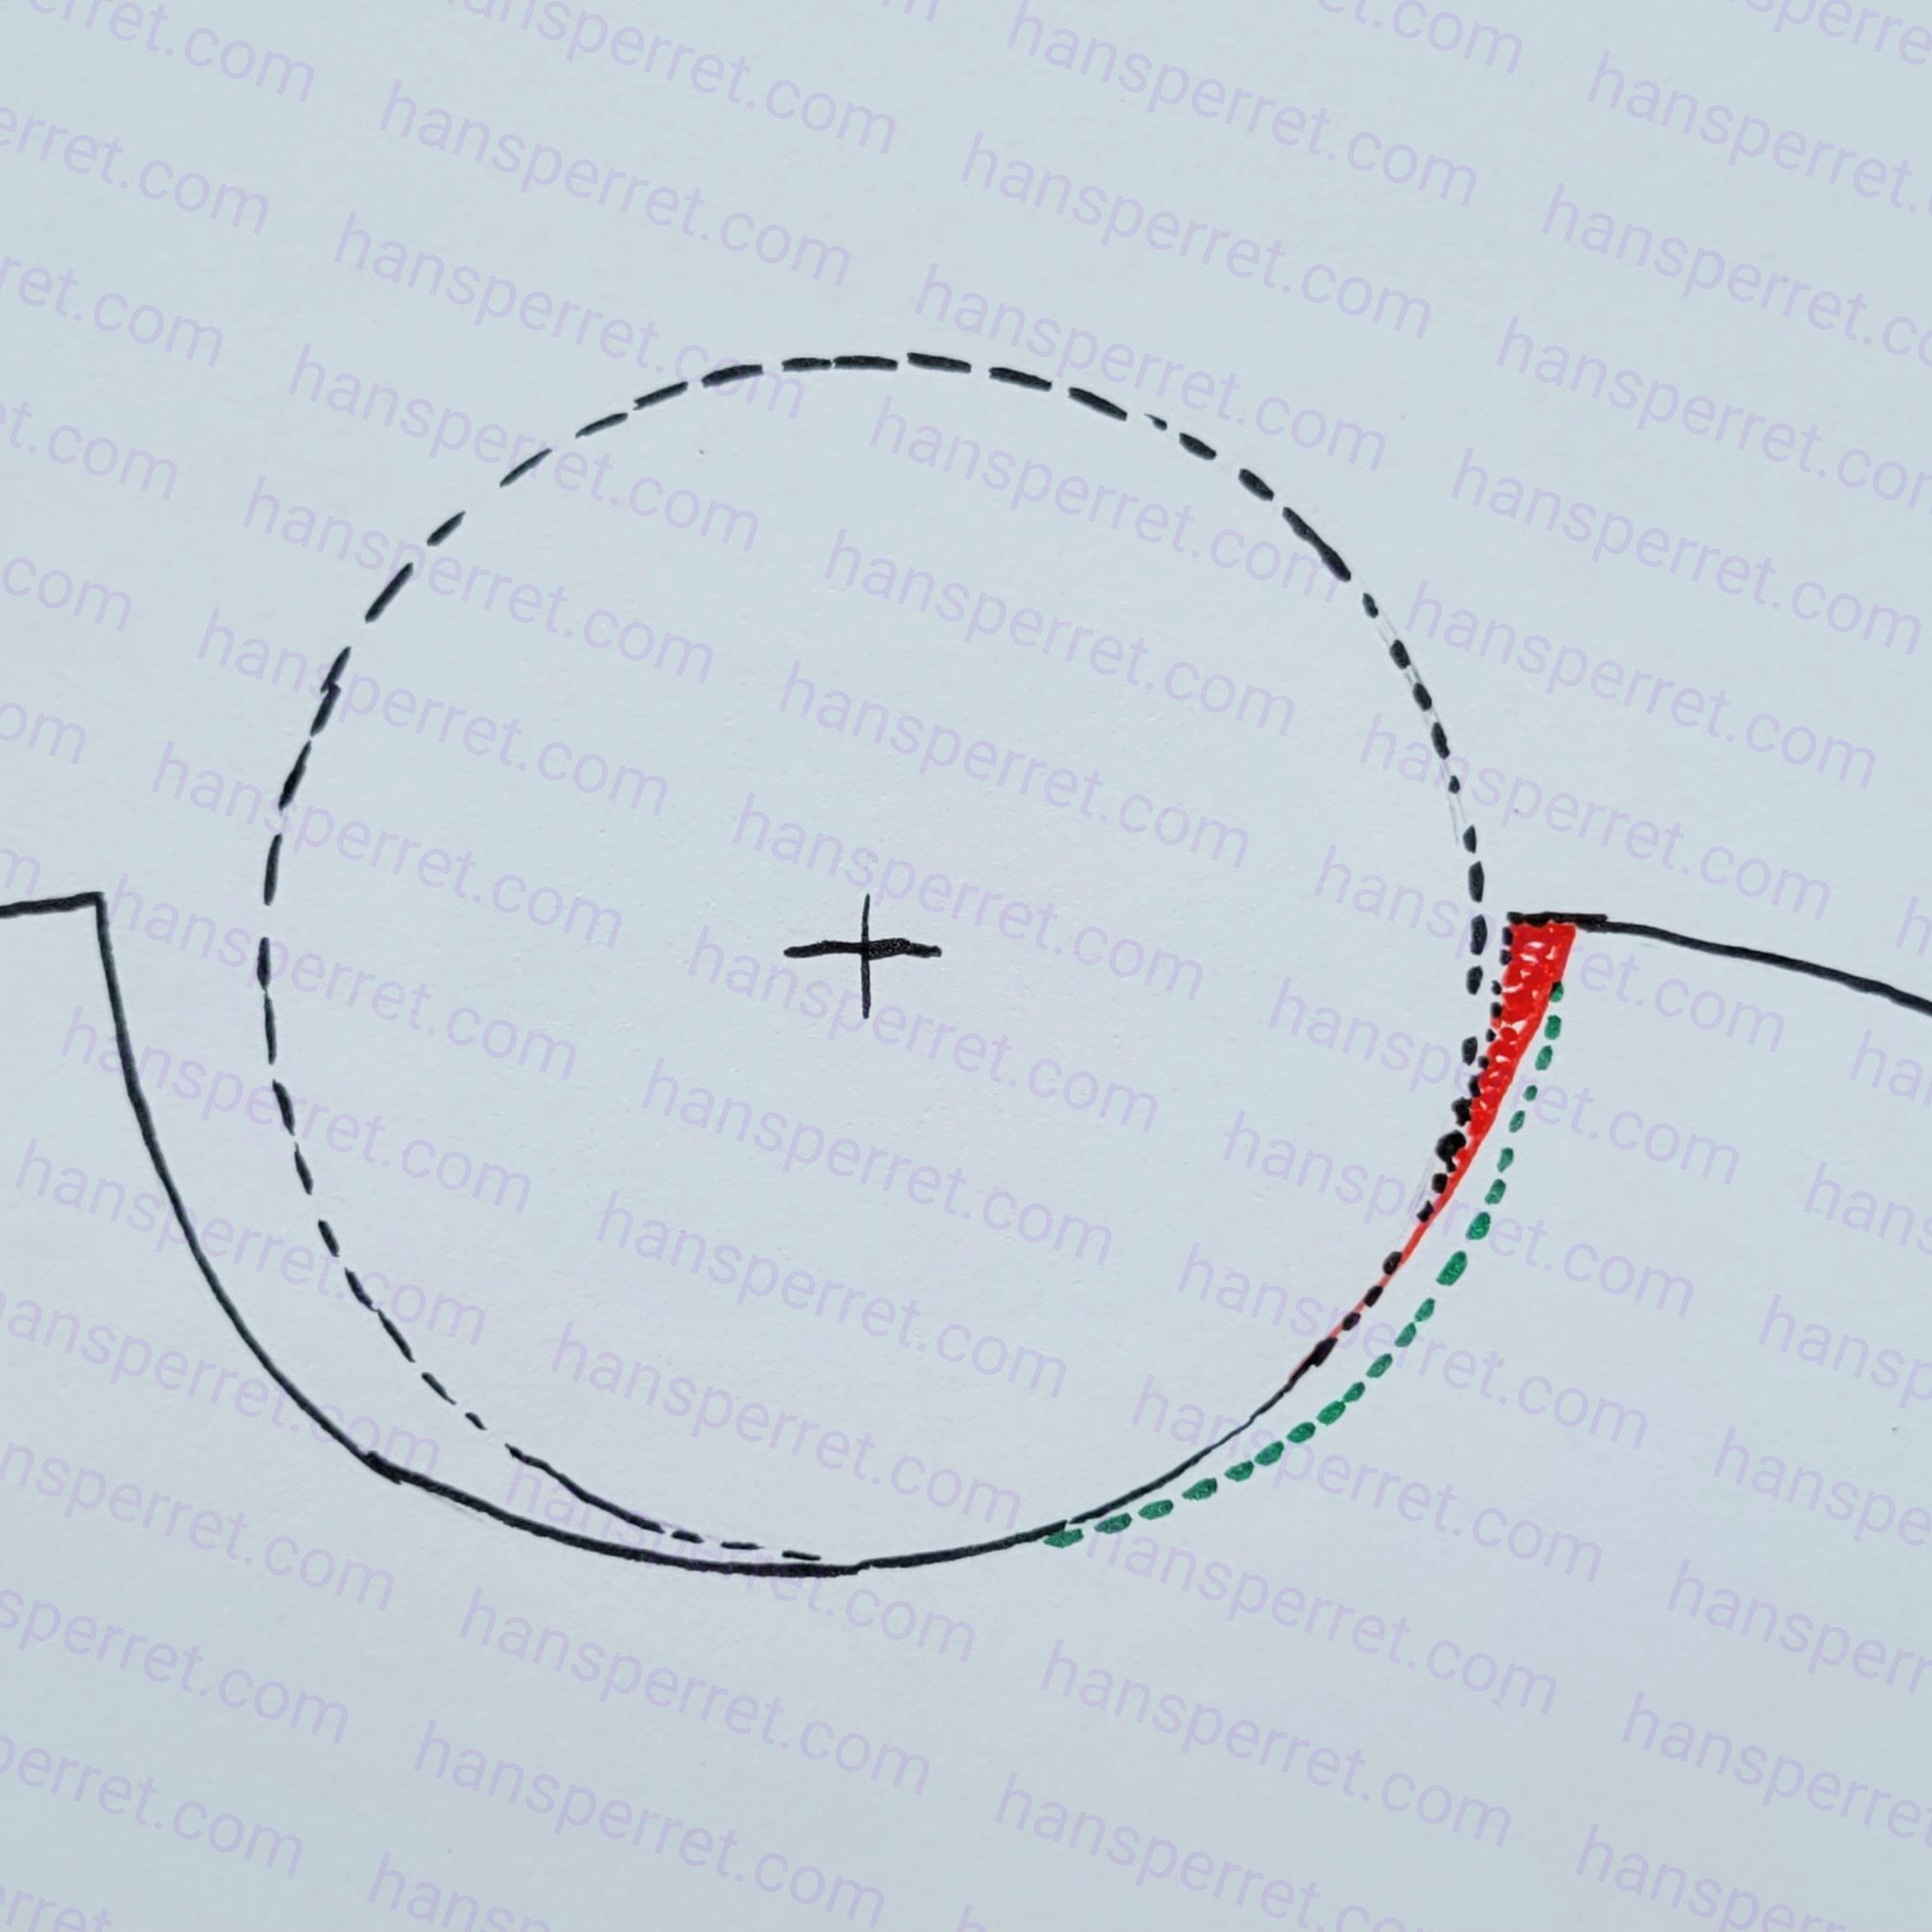
The chain has a pitch of 1/2" or 12.7mm. When in use, the bolts and the inner links wear out, and the actual pitch of the chain gets longer. This can amount to 0.1 or 0.2mm or even more in severe cases (I get back to this later). See how this affects the position of the chain on the cog:
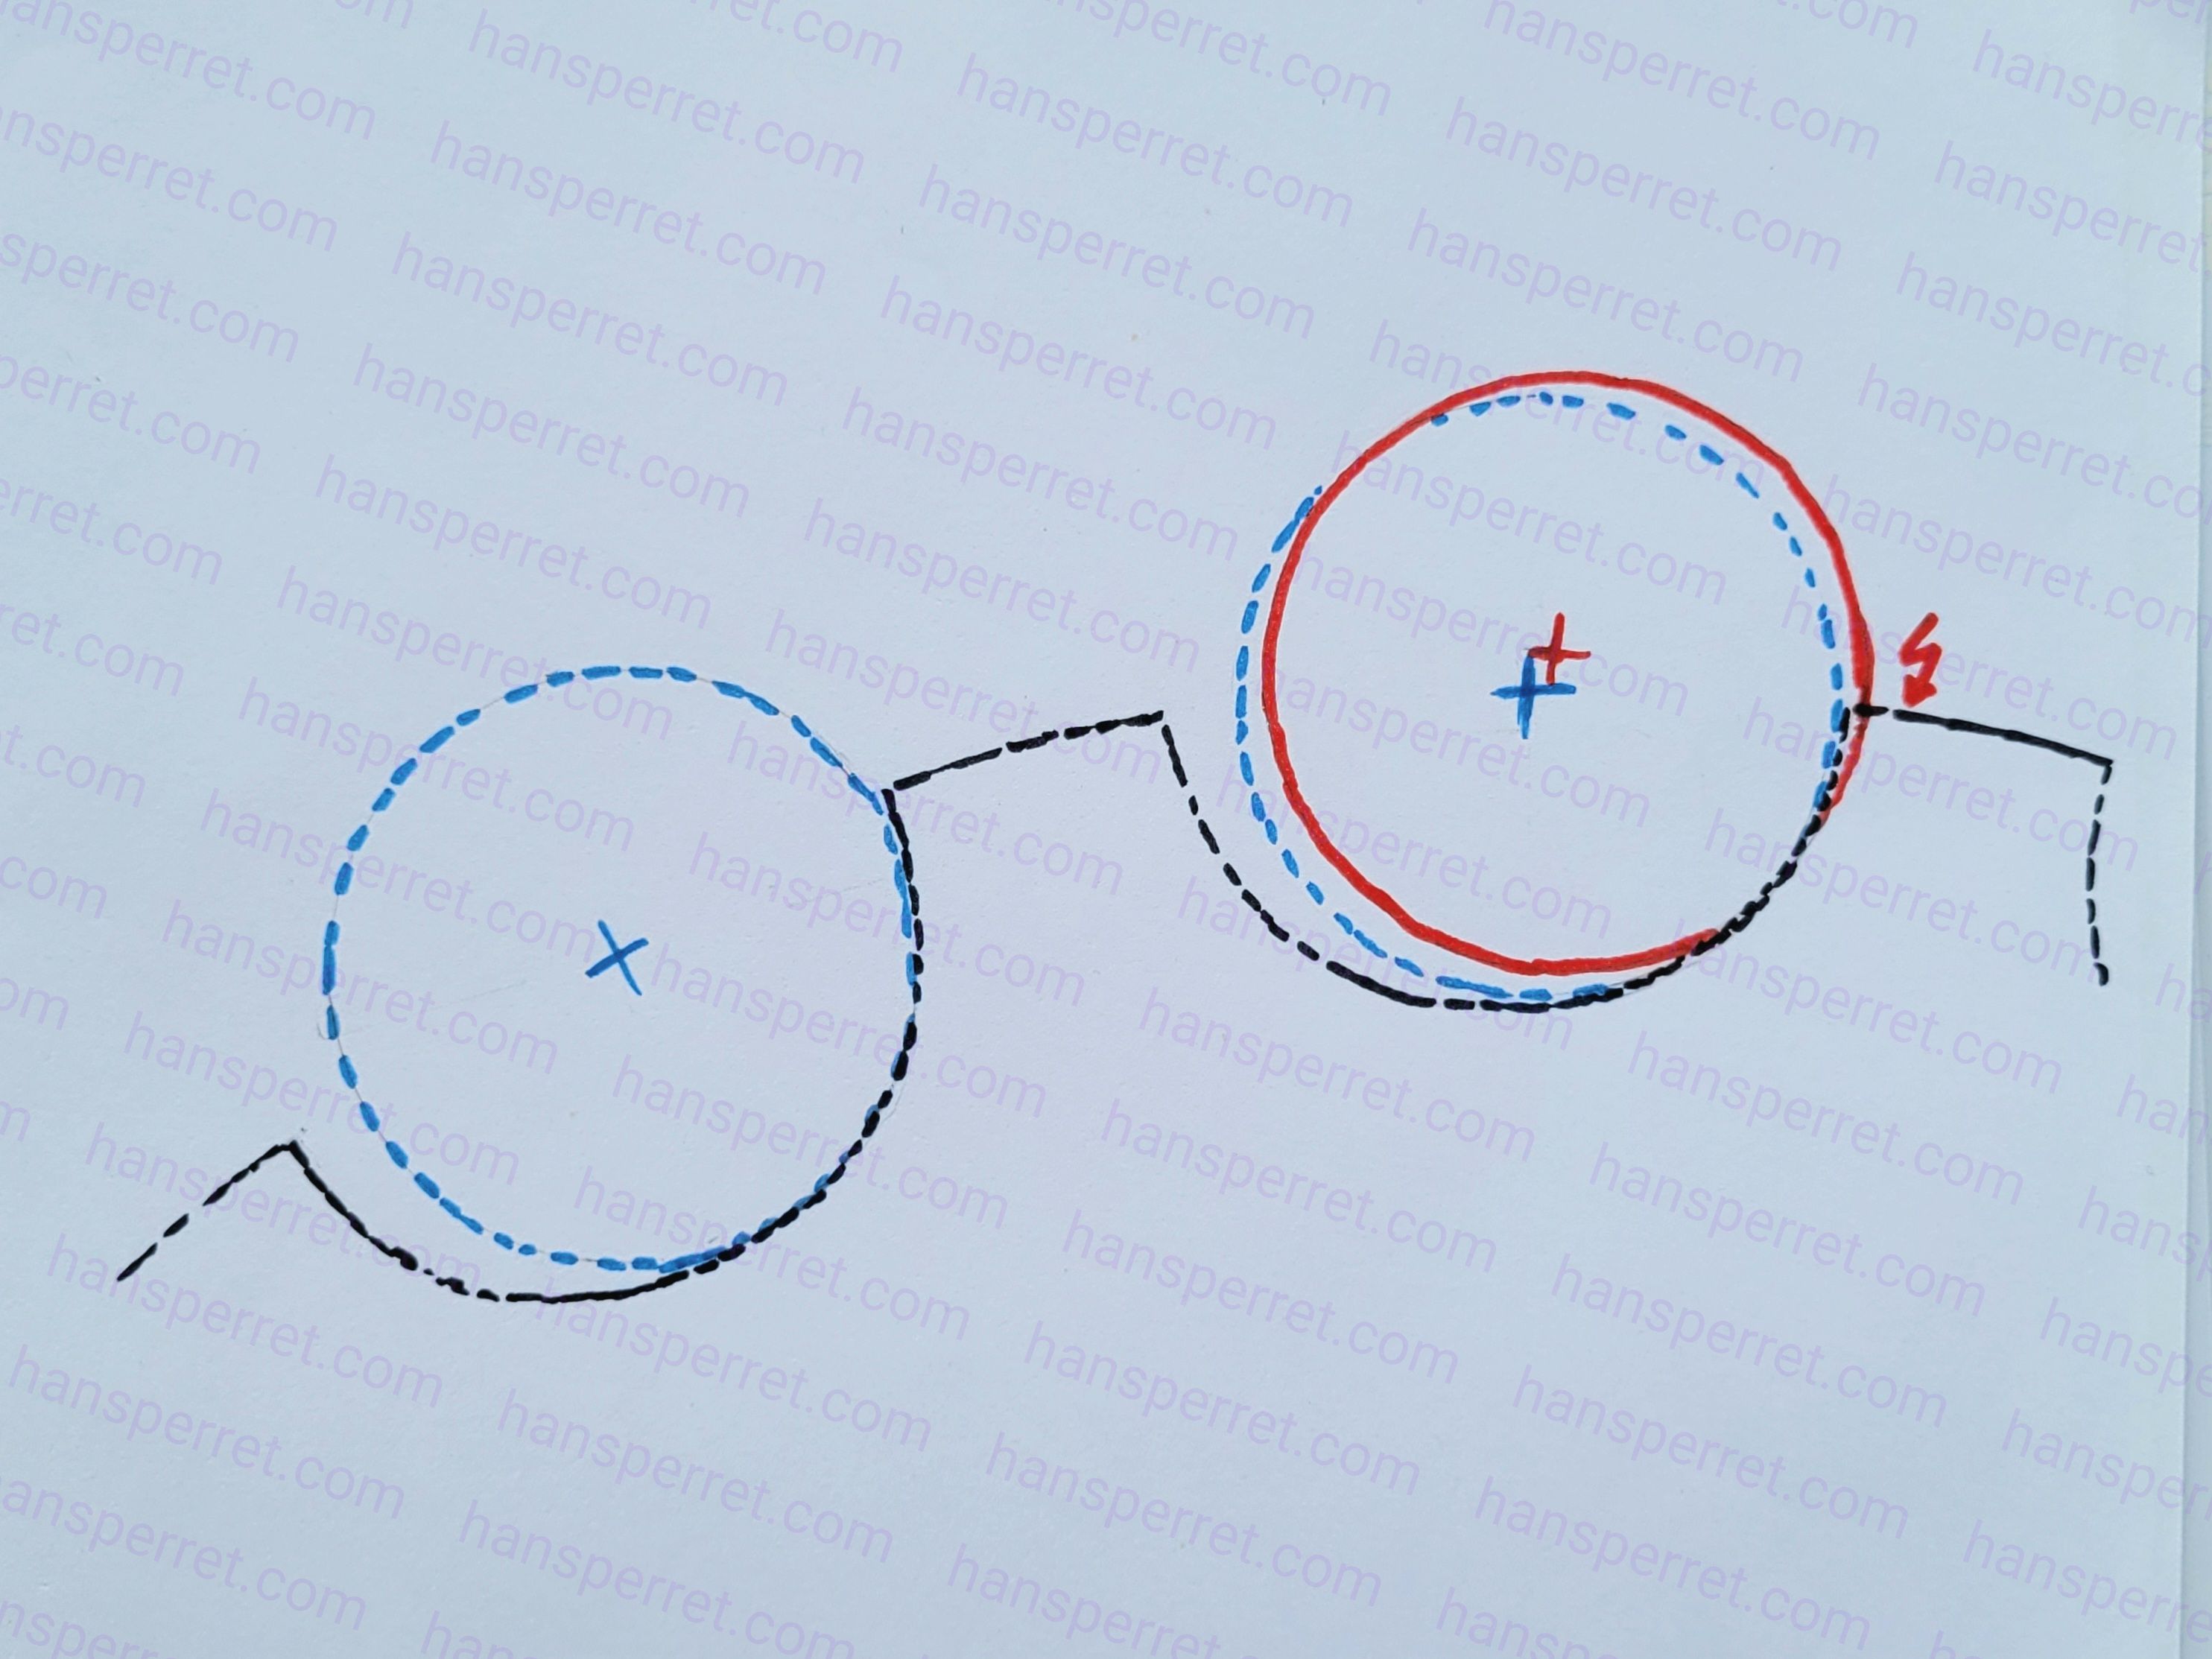
Red: worn chain with larger pitch
The worn chain creates a very punctual load close to the tip of the tooth, which causes increased wear there. Usually, it will not hop over as it is held back by the following links around the cog. You do not notice anything while riding, but the shape of the tooth flank changes as we have seen above.
When you put on a new chain and put load on it, the rollers will move out to this slightly larger effective diameter of the cog. The problem is that the pitch is now too small for this diameter, and the chain will not engage at the other end. It is pushed on the tip of the teeth instead.
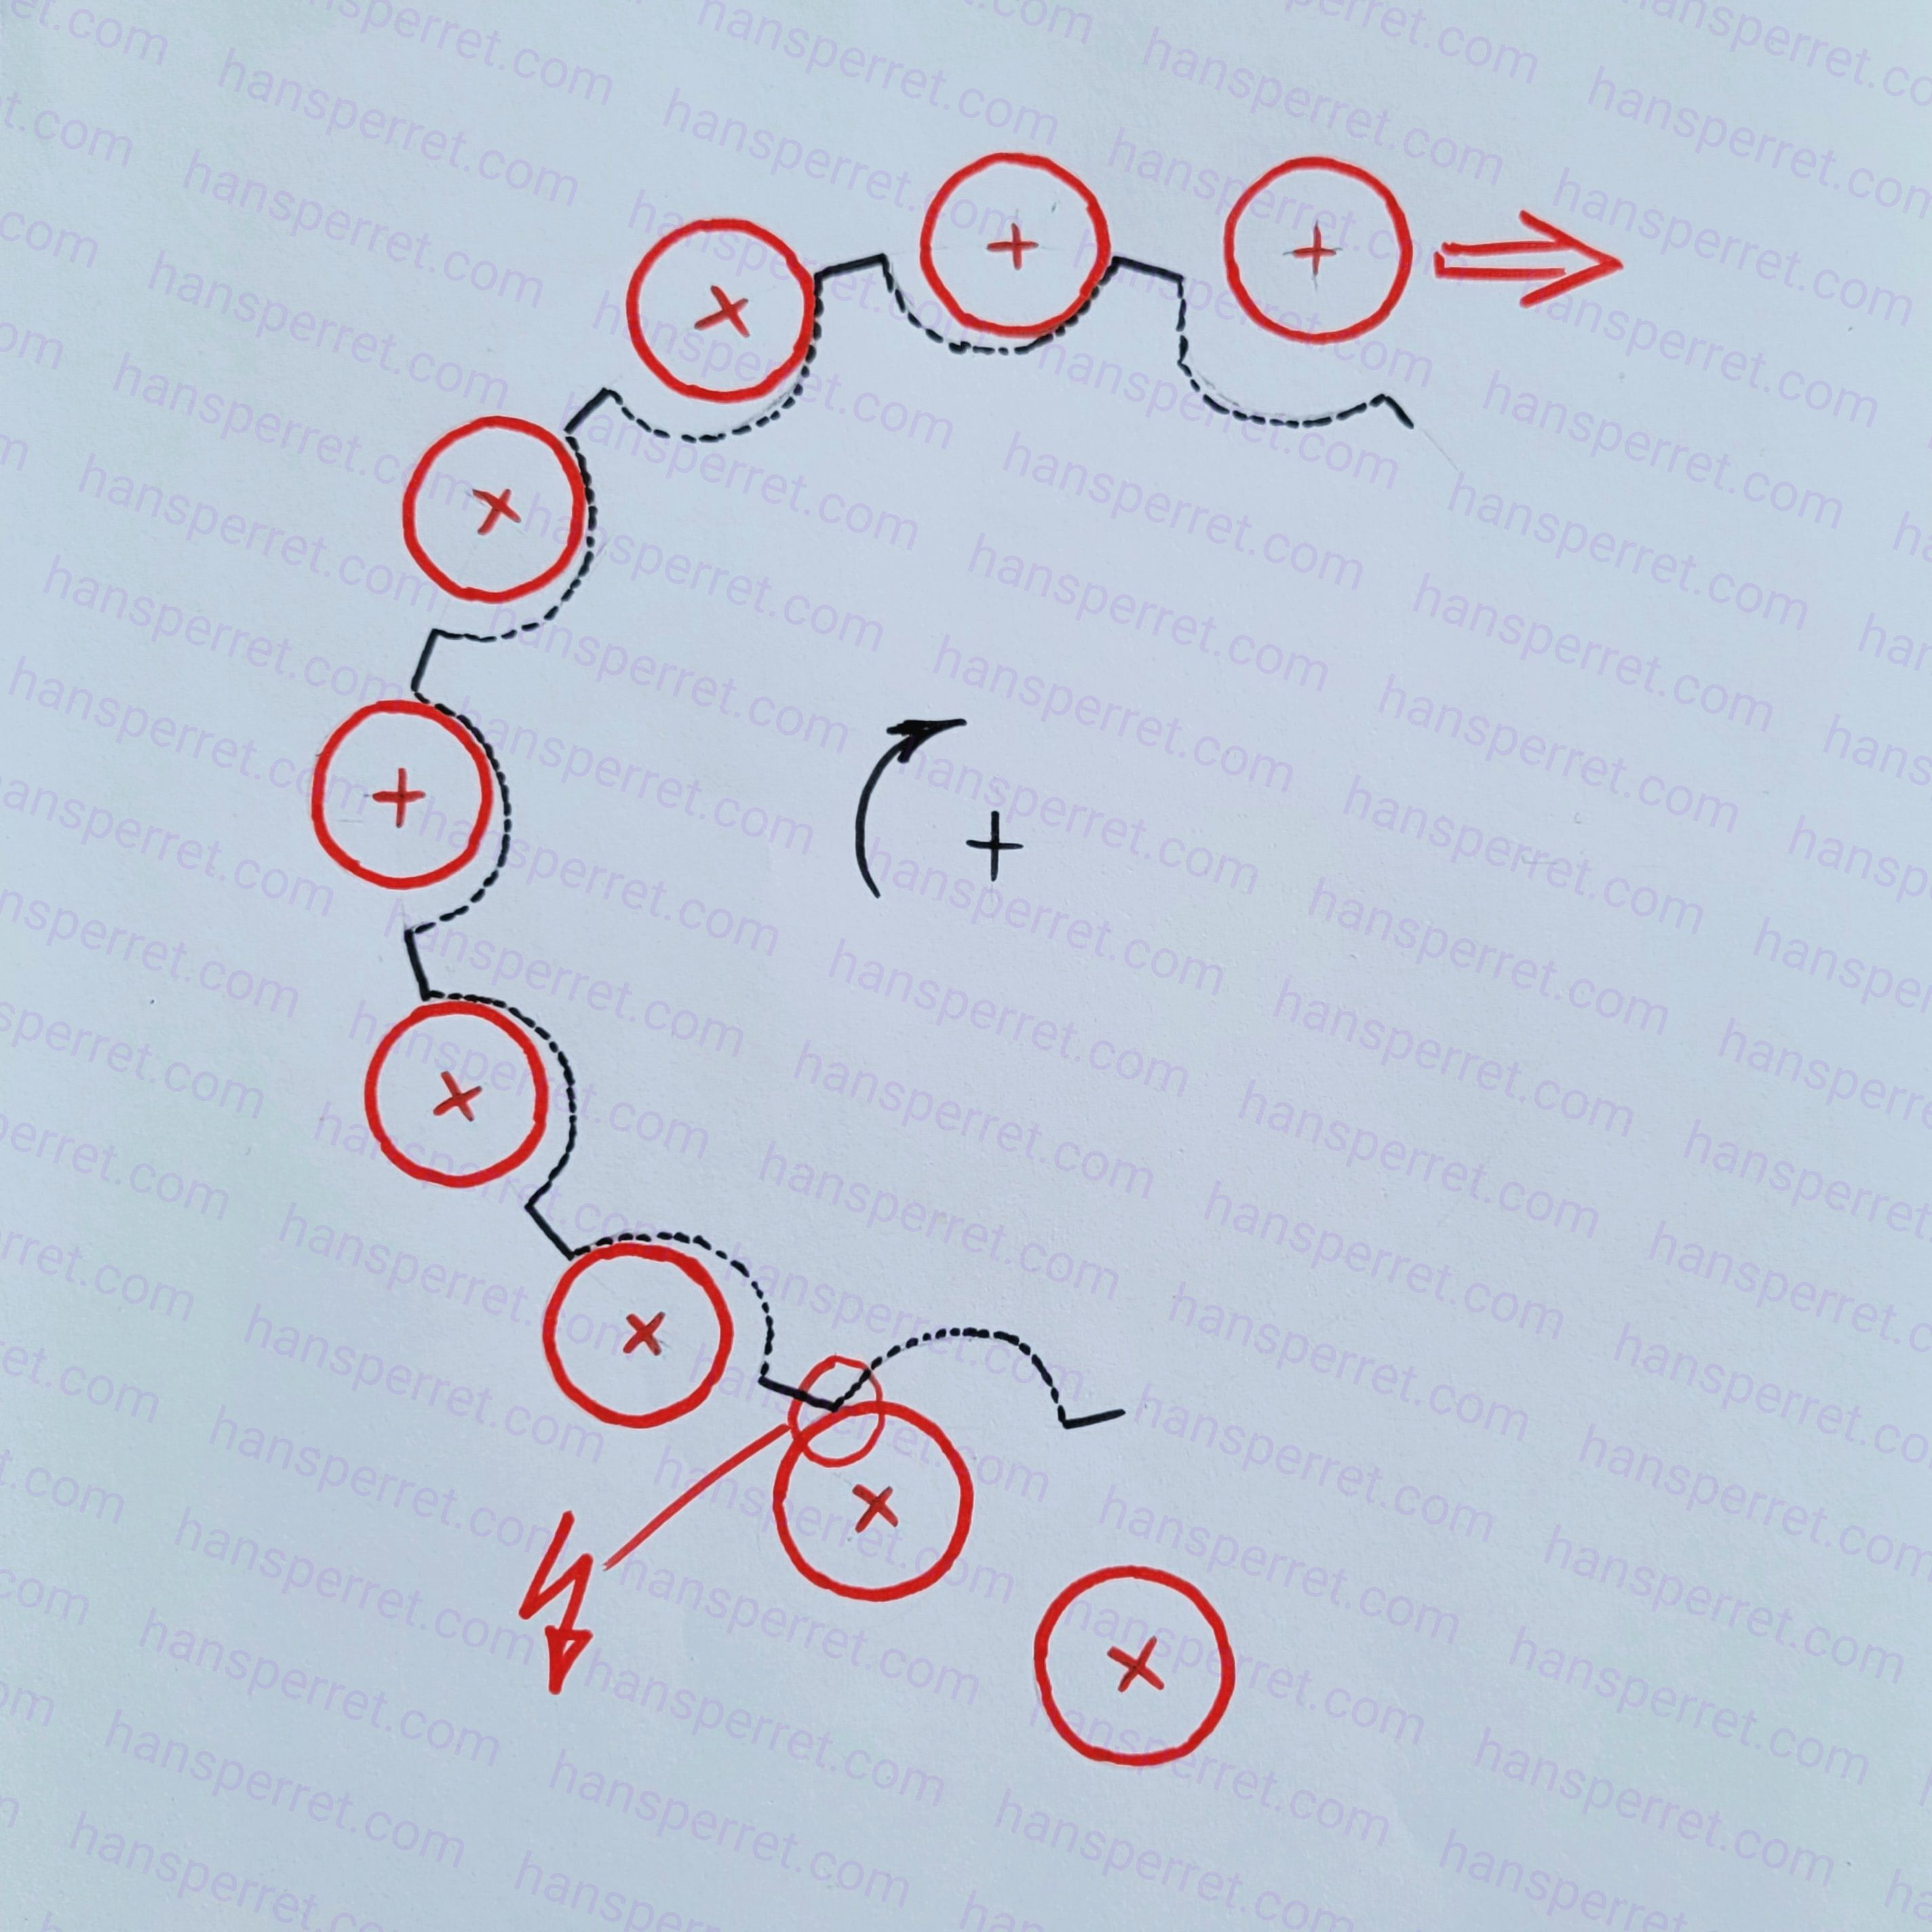
New chain on worn cog: hopping over!
As you have seen in the first photo, the shape has only changed by a minimal amount. Removing a few milligrams of material on each tooth in the right place brings back functionality.
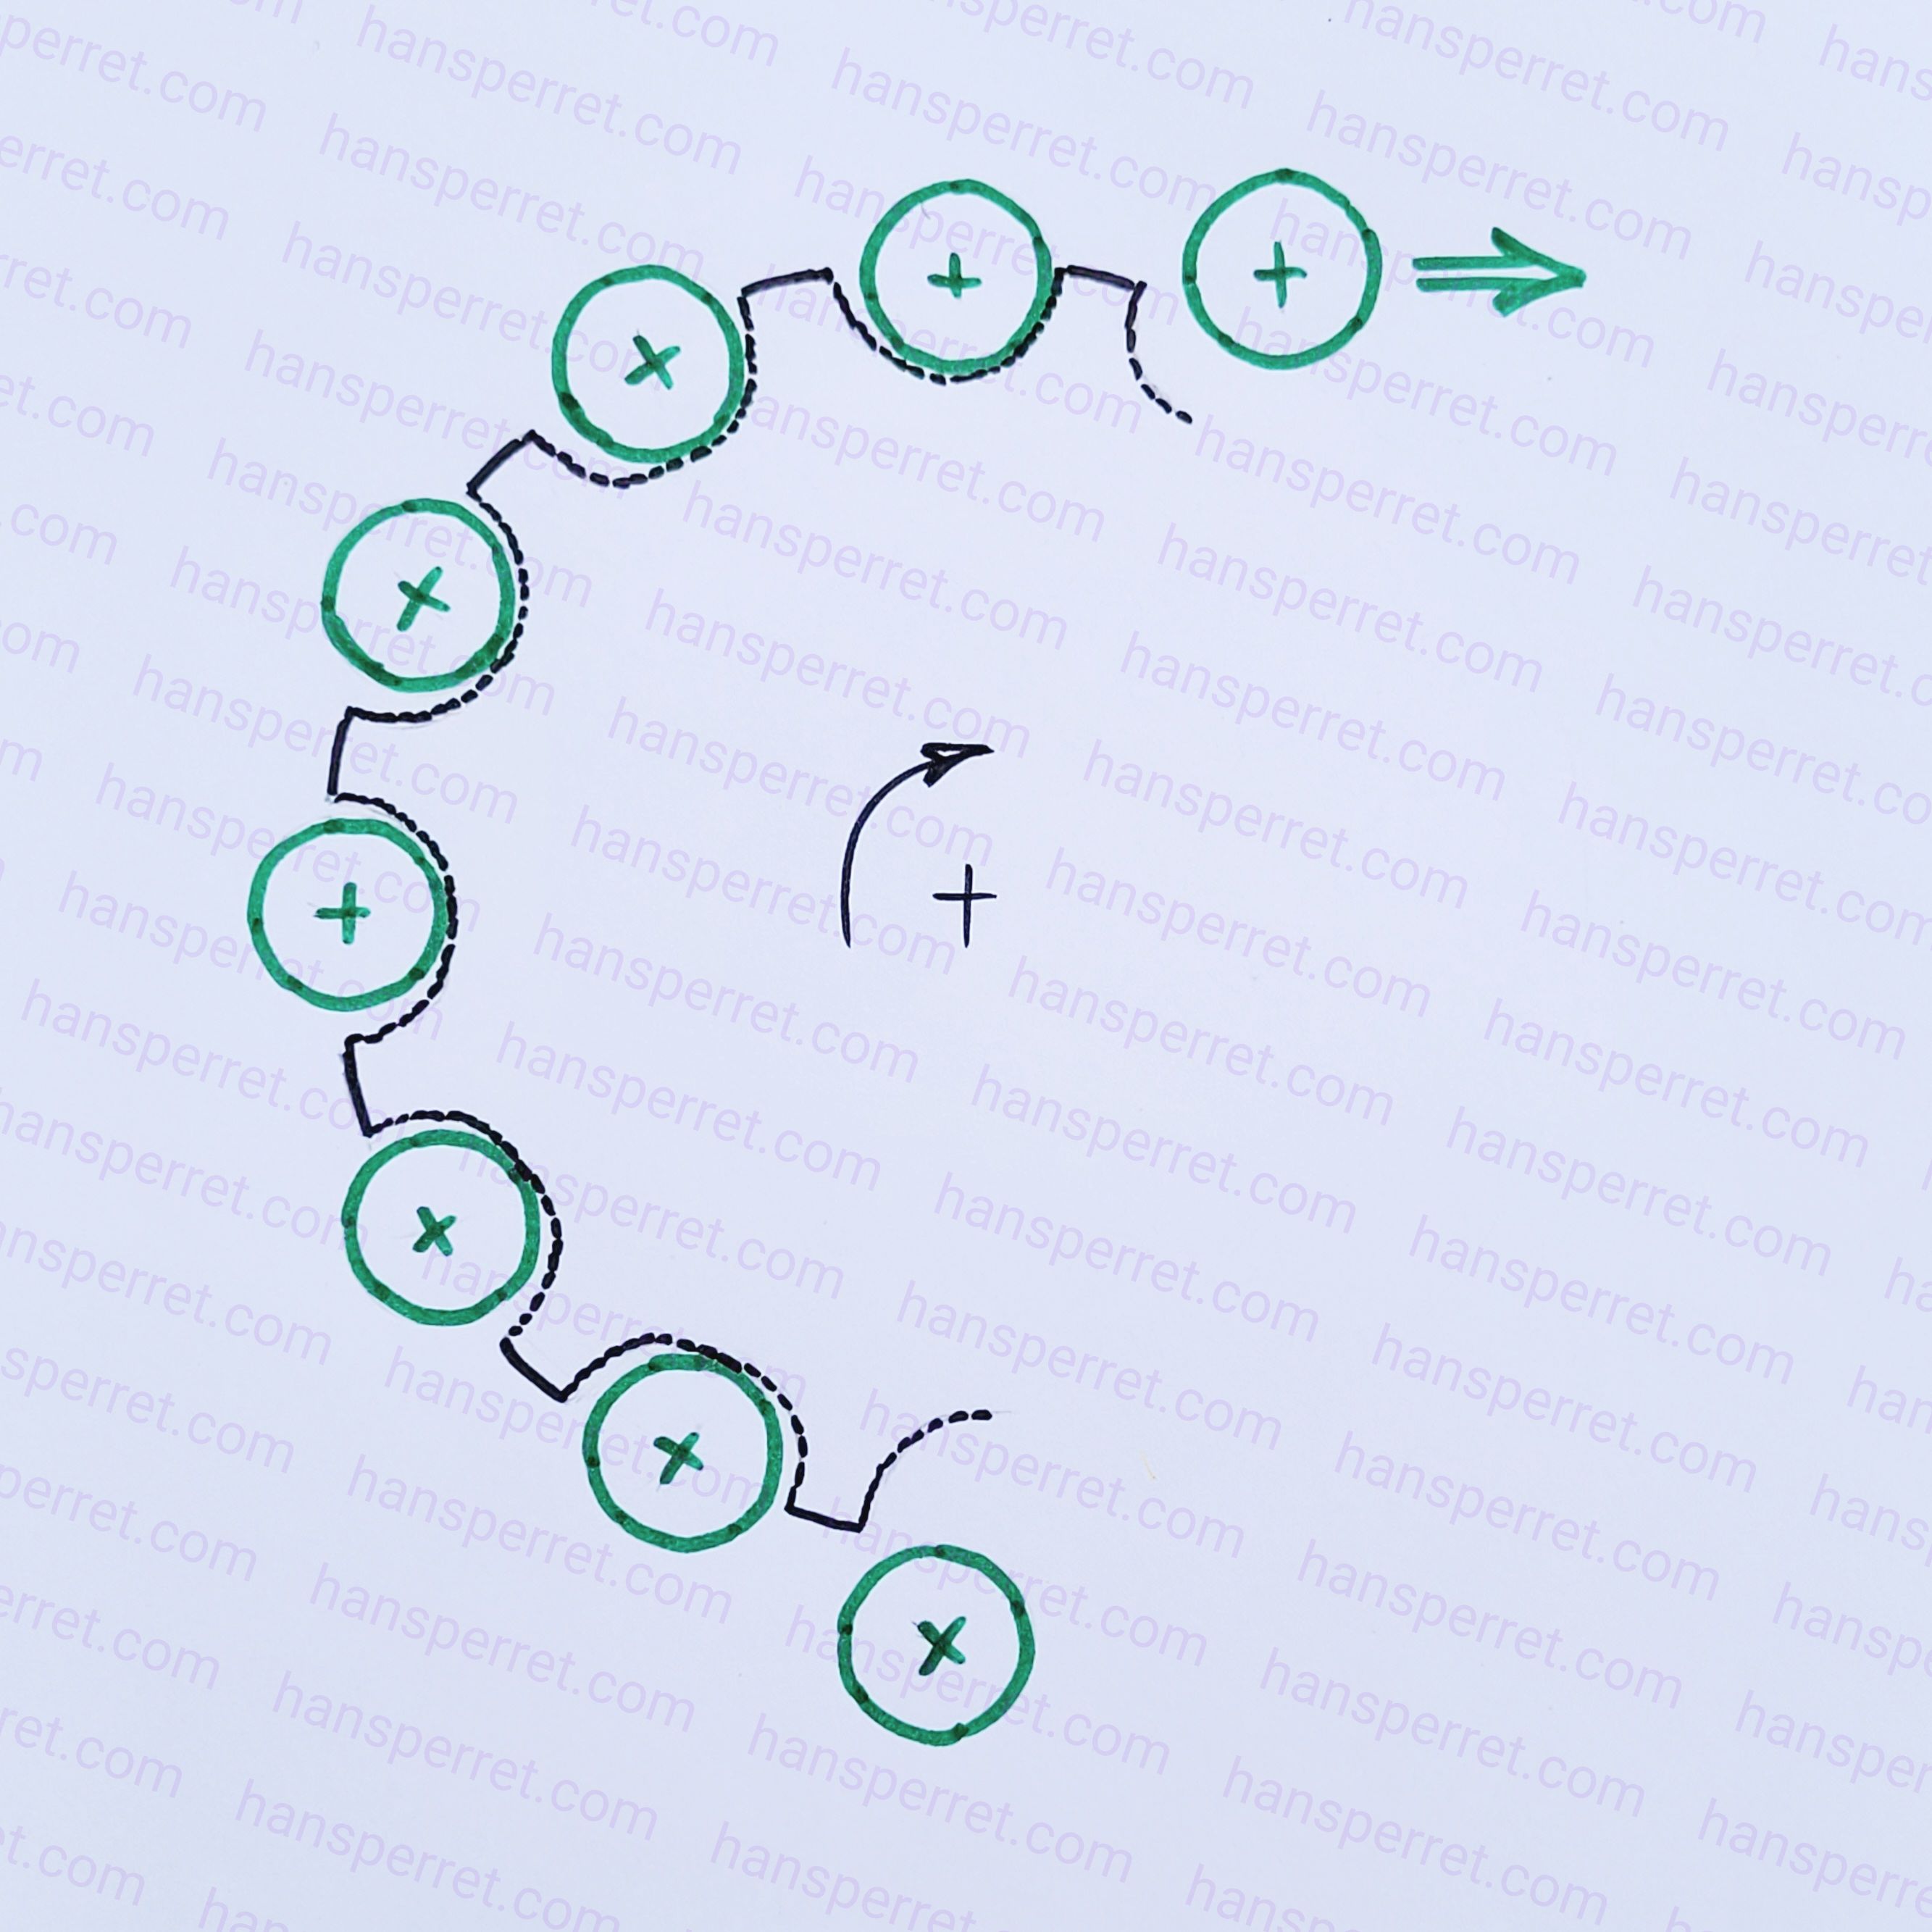
The restored shape is basically the same as on a new cog - only moved forward slightly, which makes the teeth a bit narrower. The new chain engages on a correct effective diameter, the load is distributed among several teeth, and we start over again. Here is how it looks on the example above:
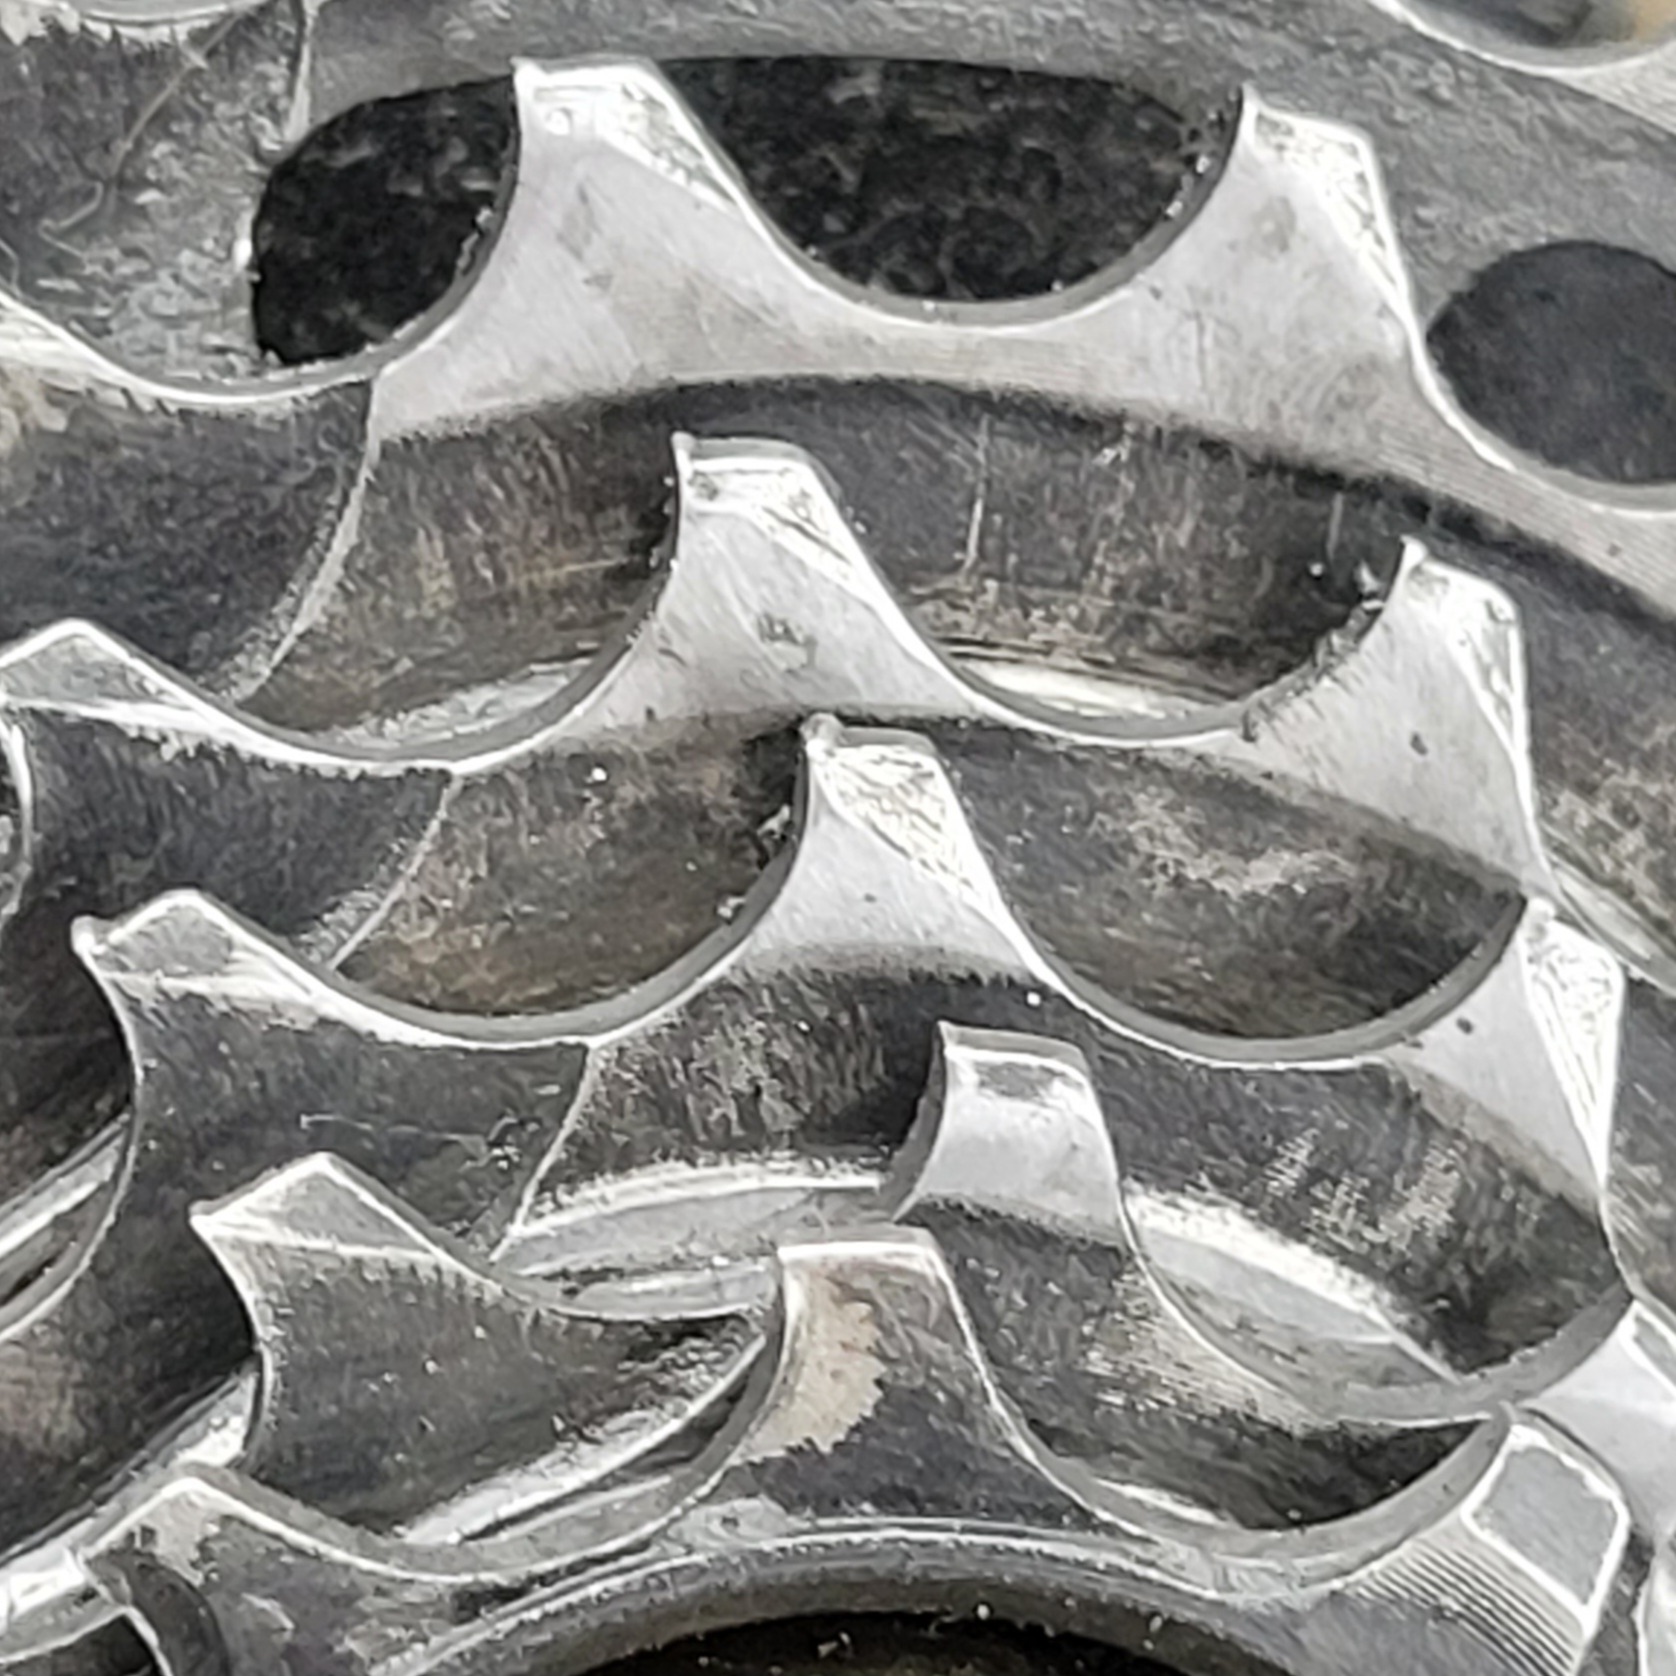
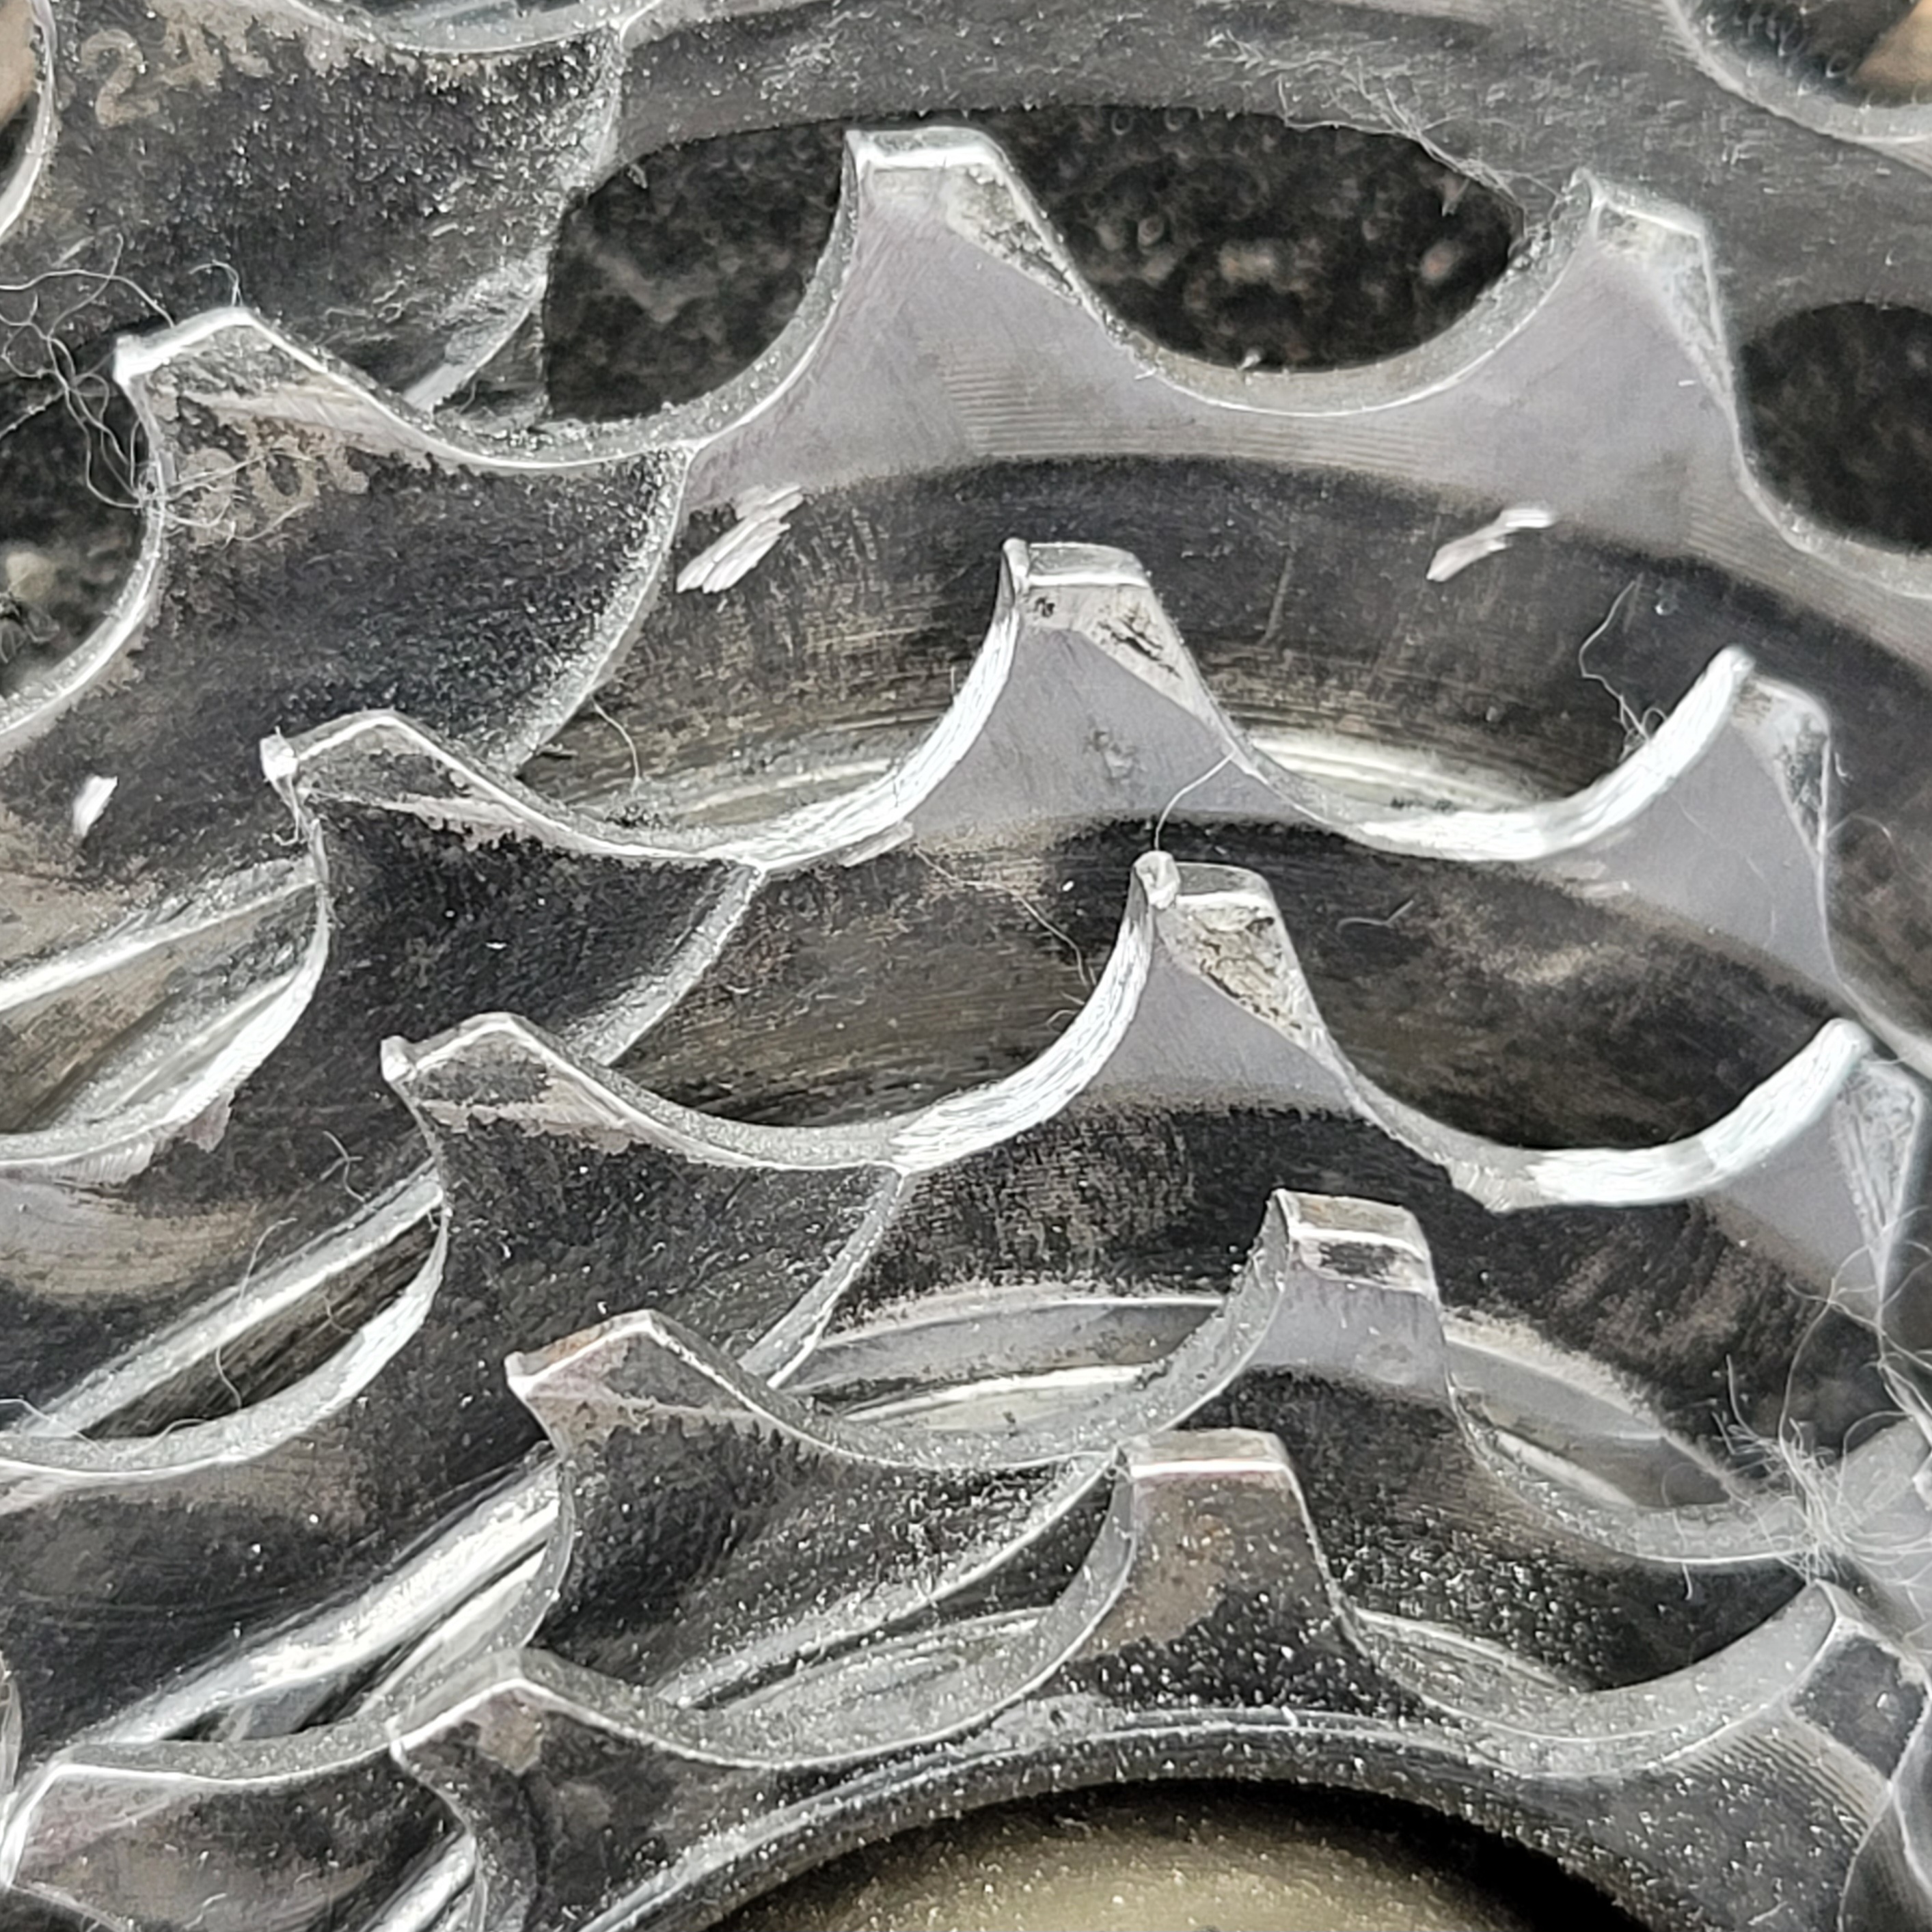
The difference is rather small, but you can spot it in the photos. Rework was done on cog 3 and 4 (see initial video). Cog 2 might still need some treatment, as the chain hopped over on rare occasions.
As you can see in the clip above, I use a Dremel-style tool with a small cylindrical grinding tip. Work with a very light touch and check the shape frequently by comparing to the cogs that are still working fine. Unfortunately, I did not find a better method for checking yet - the ultimate test is pedaling hard with a new chain.
Find some helpful info for you below and remember: you do this at your on risk. And you are welcome to contact me with problems or ideas.
Protect your eyes!
*
Mark your starting position on the cog.
*
Do not touch the edge of the teeth - you go for a nice rounded shape below. See my drawing above.
*
No worries if not all the teeth look exactly the same. The treatment works anyway, and it will not feel rough in the pedal.
*
Life is hard when the cog underneath is only one tooth smaller, as it gets in the way. It is still possible with a very small grinding tip.
*
You can do this also on very large cogs or chainrings. Take care: aluminum will clog your grinding tip. Use a milling cutter or a round file (if there is no larger cog beside)
*
If done multiple times, the teeth get too narrow, with increased risk of breaking. Two or even three rounds are reasonable in my experience.
With this know-how, I feel so much more relaxed about the state of the drivetrains on my bikes. Still, it would be nice to avoid the exercise, right?
Much of it comes down to chain wear. It is a good idea to check the chain now and again, especially when riding a lot in the wet, with dirt or sand around.
You do not even need a chain gauge. Measurements can be done with a caliper or with a precise ruler.
Caliper method: I usually measure inside 10 chain links. The nominal length is
10x 0.5" = 5" = 127mm.
A chain roller has around 7.7mm diameter, so a new chain should have an inside length of
127 - 7.7 = 119,3mm.
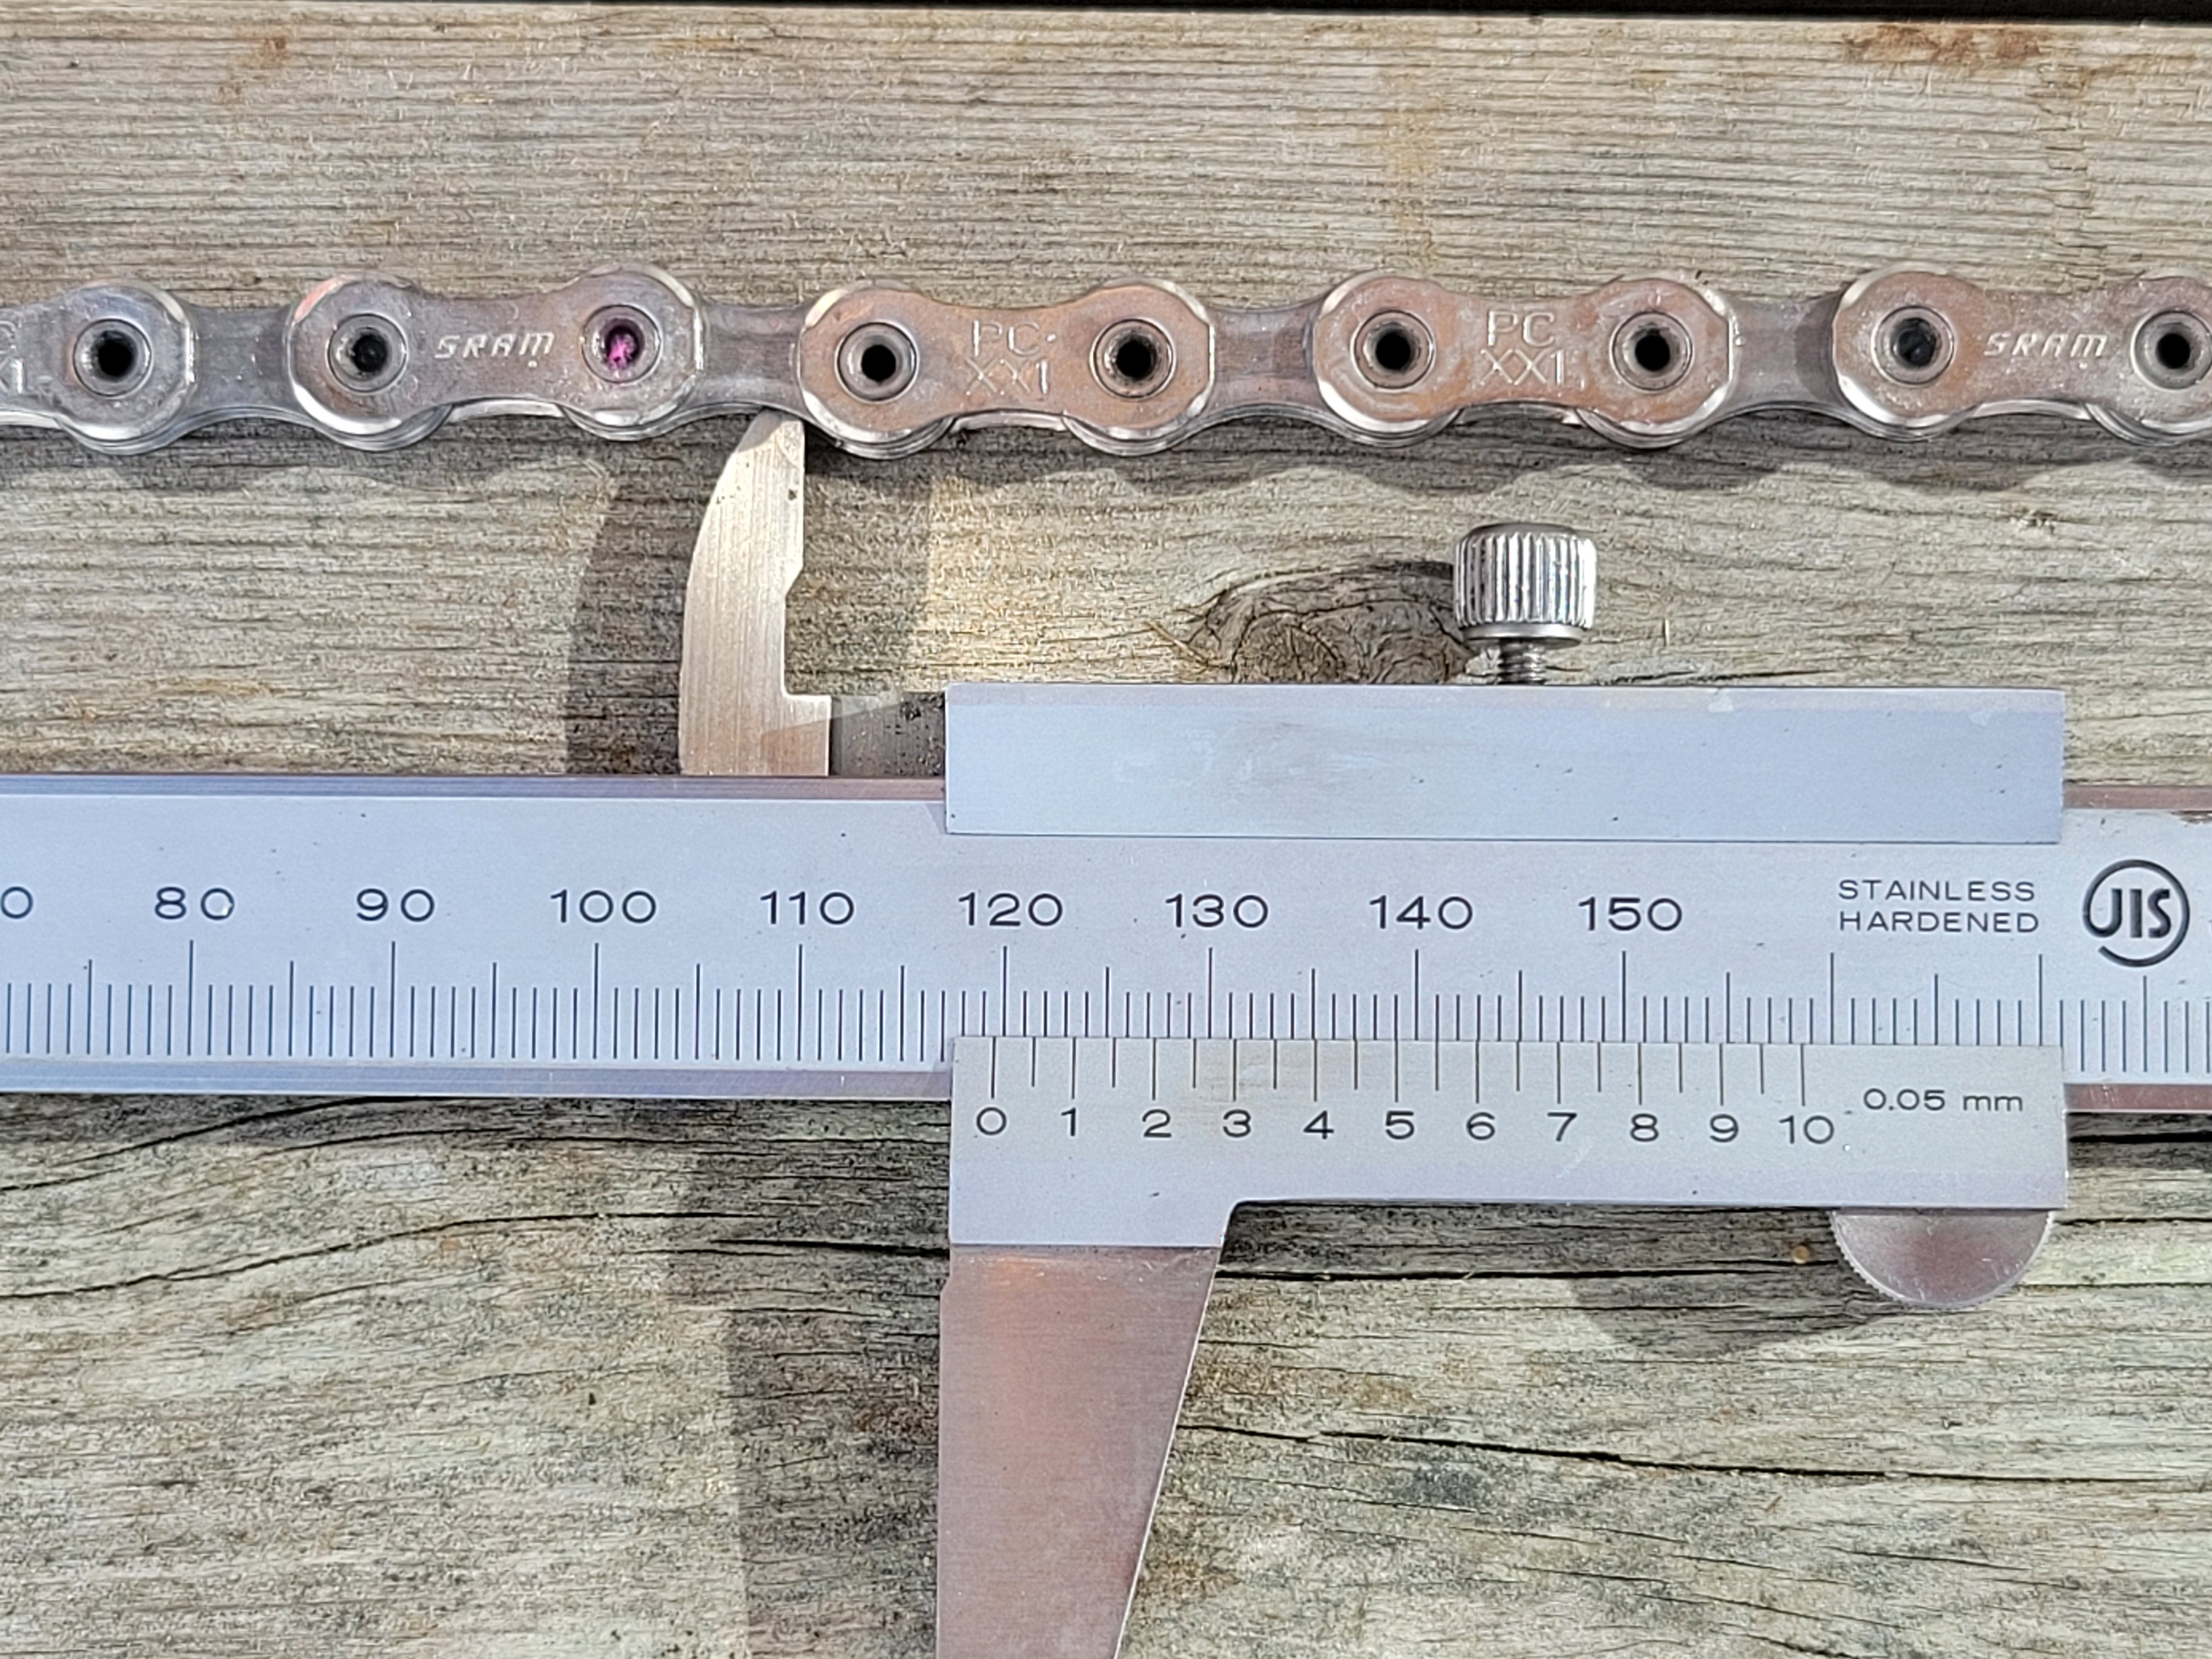
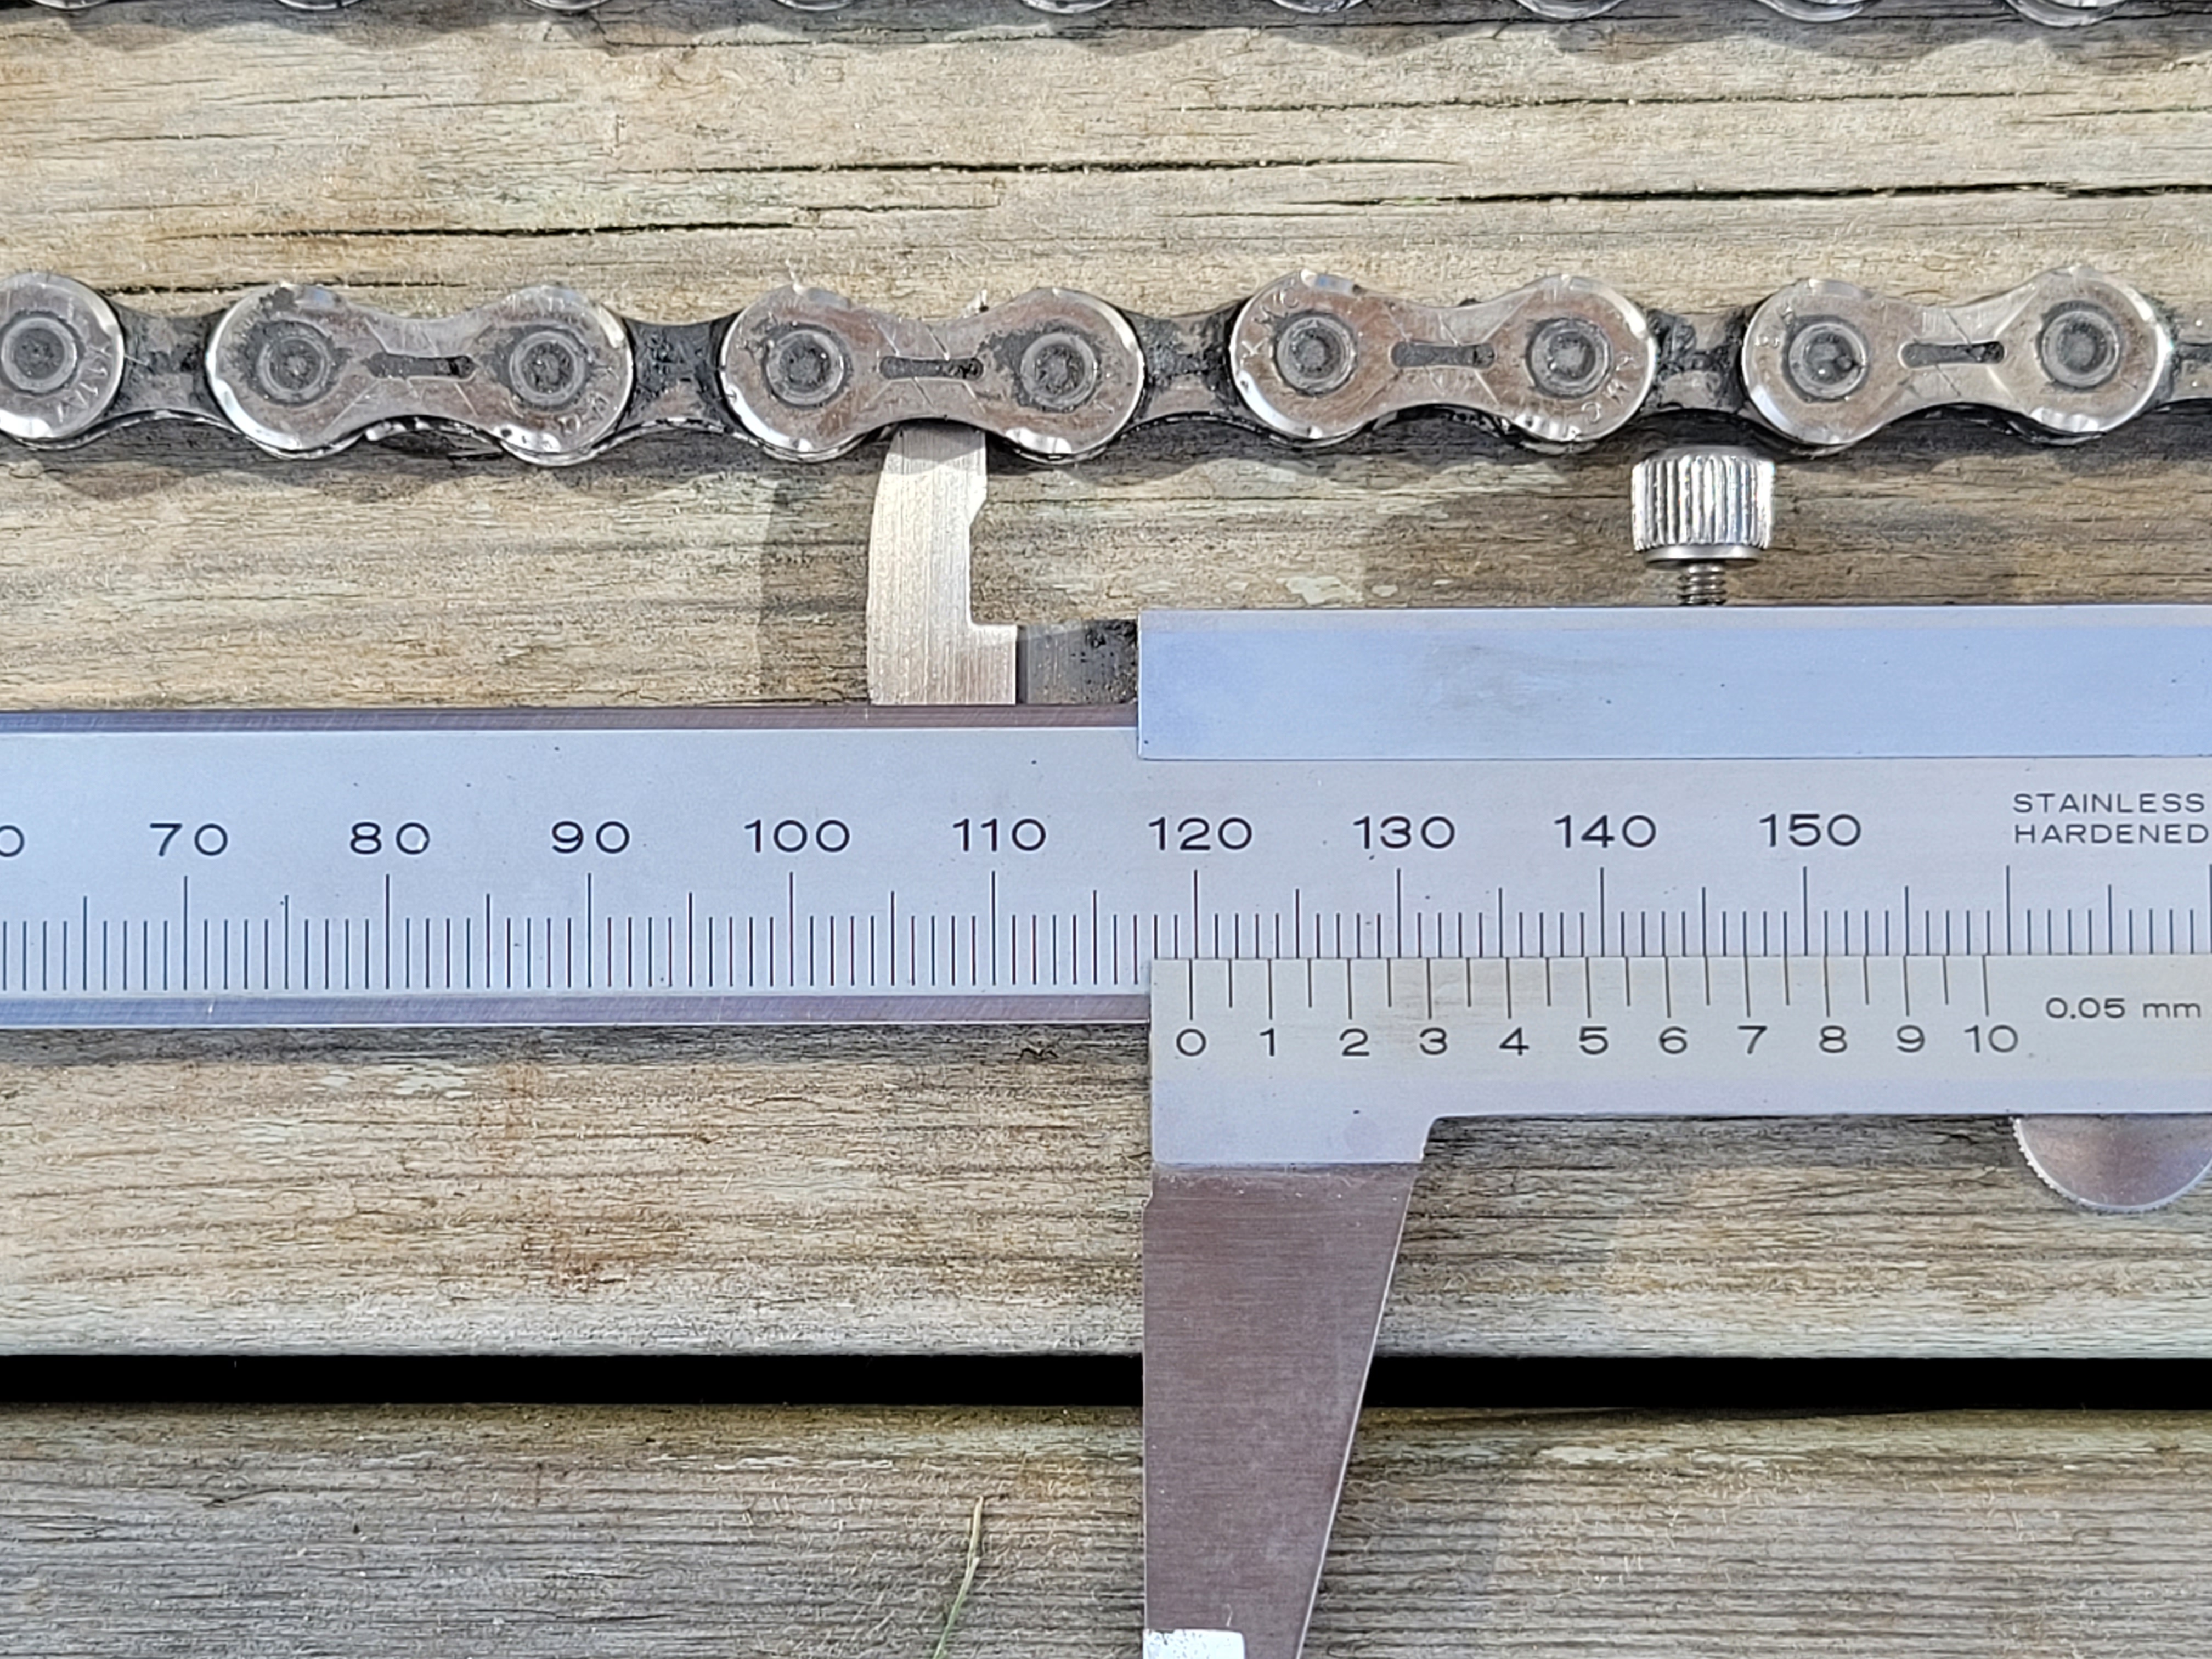
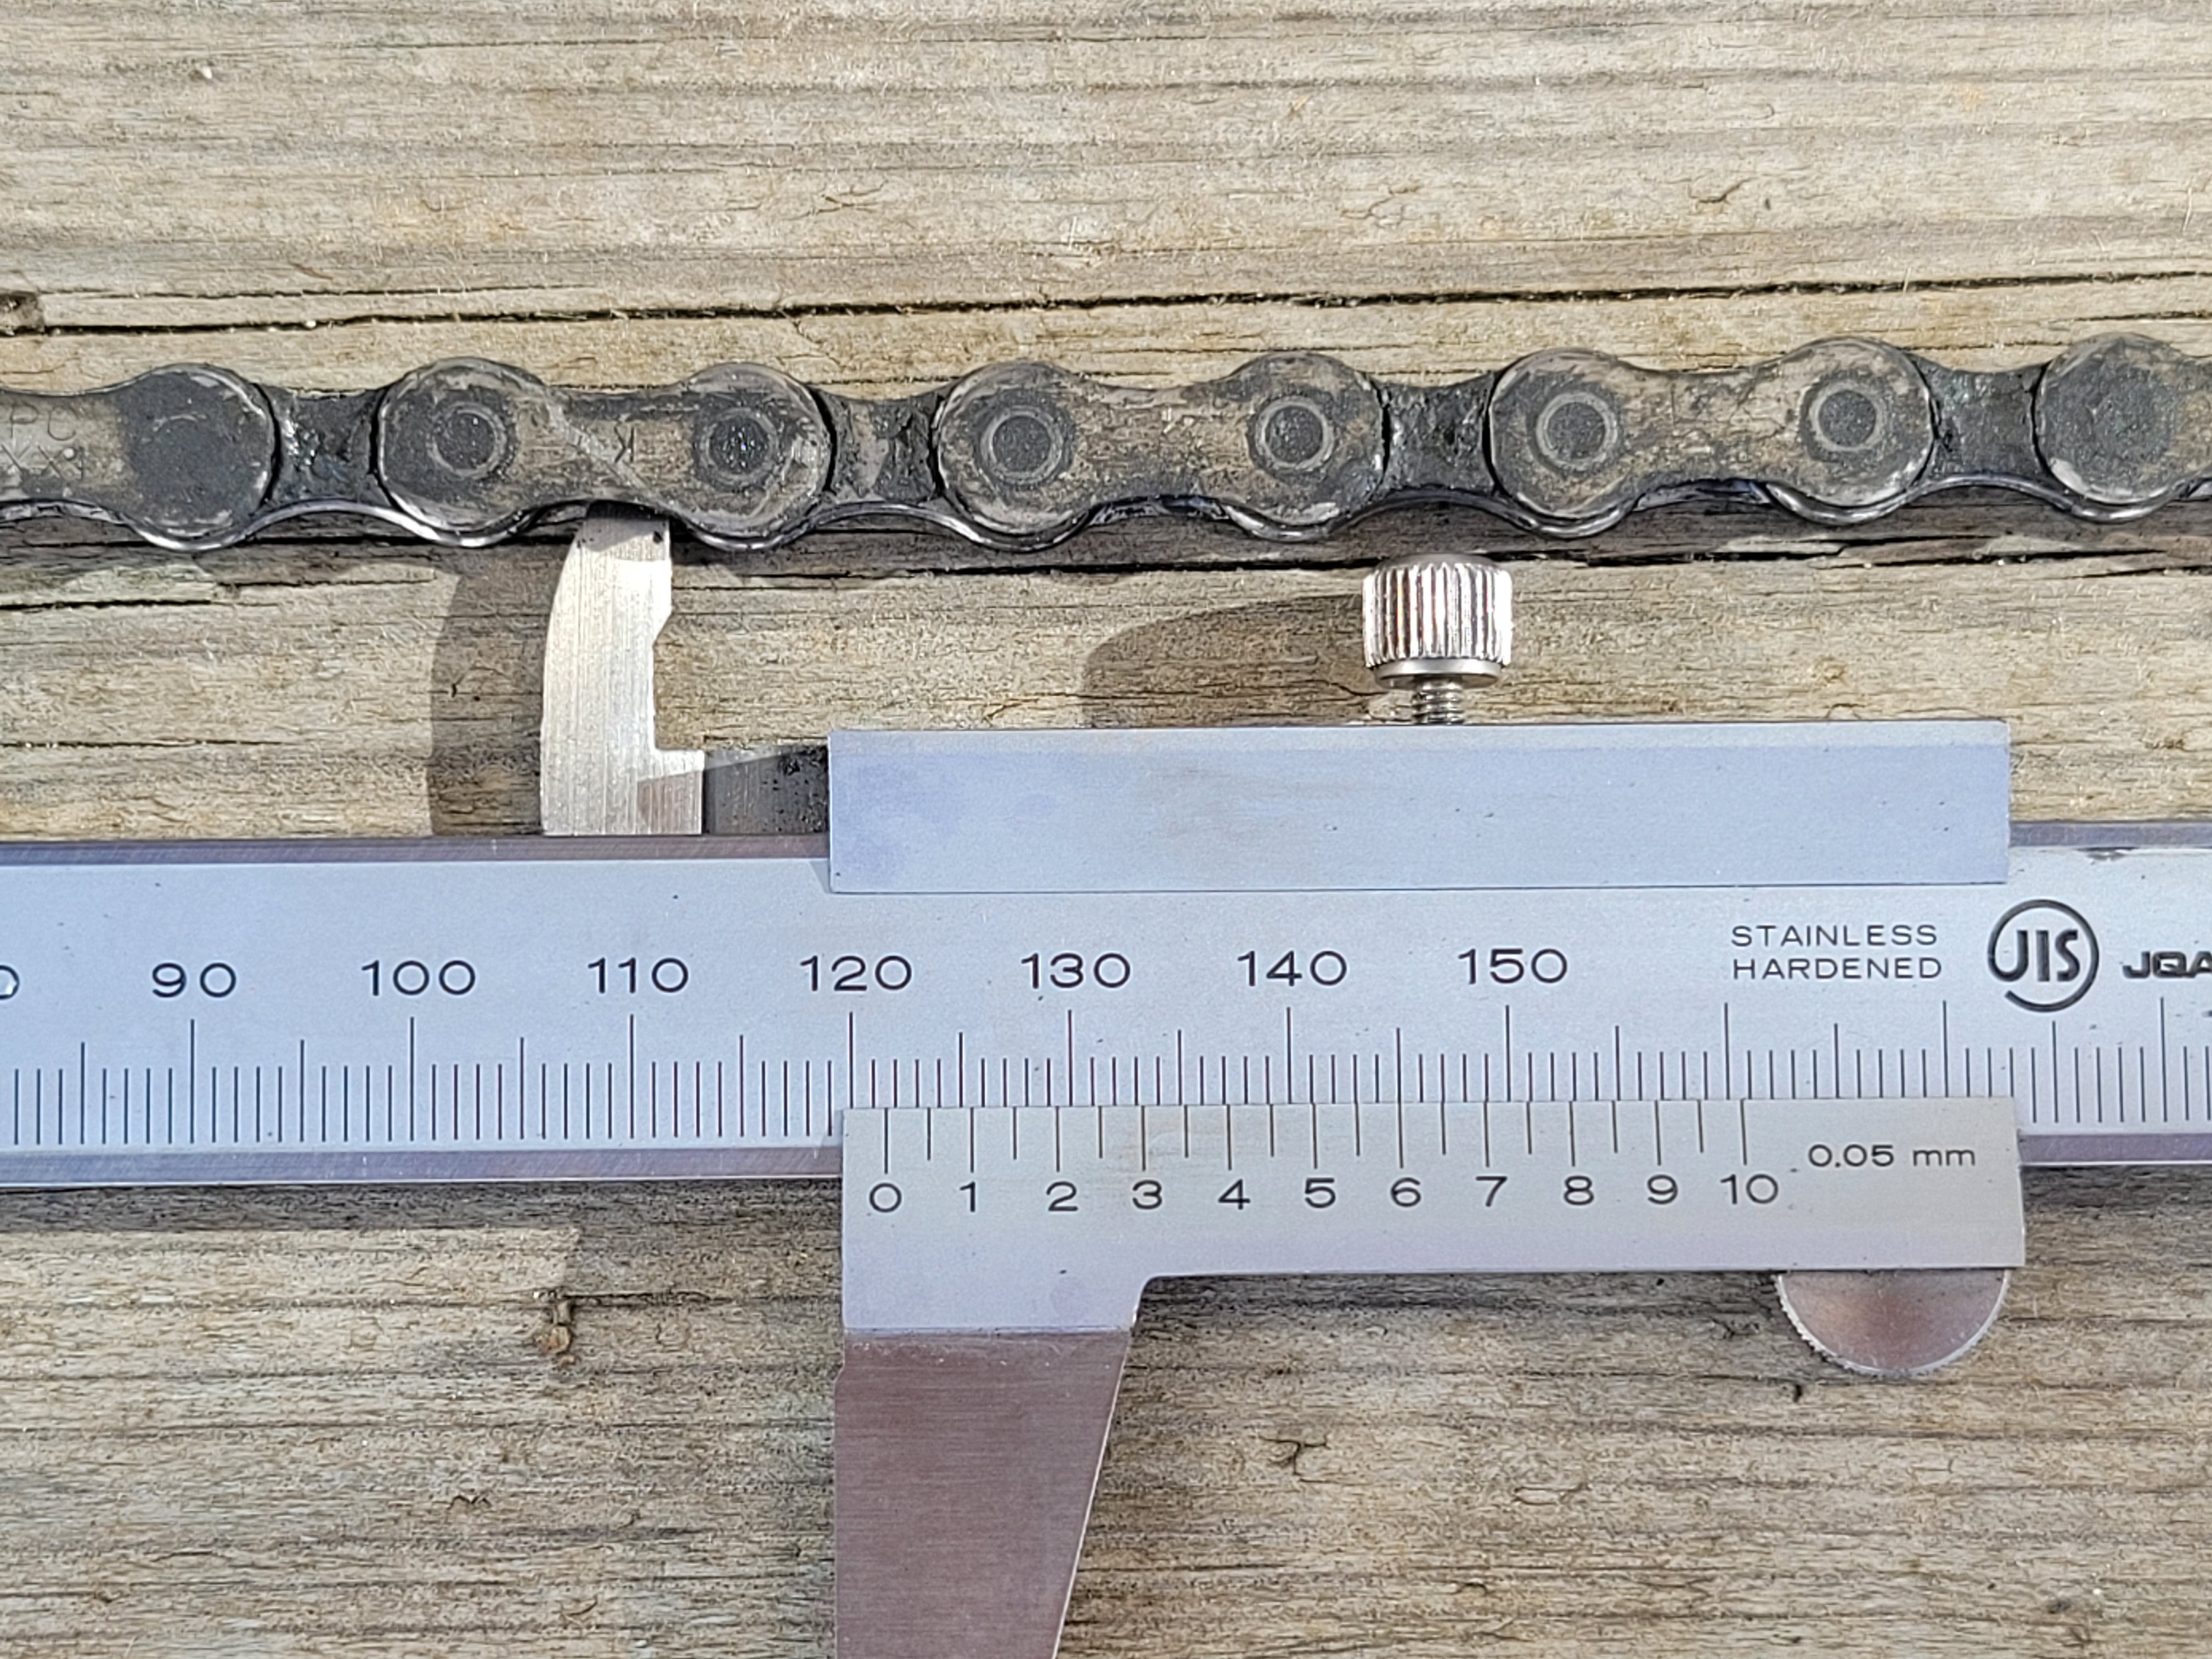
The new chain measures 119,5mm. There is some play between rollers and inner links, this adds to the calculated length.
The shock example is actually from one of my bikes - and I did not notice until I intuitively wanted to measure the chain. Of course, the new chain hopped over some cogs. Now you can probably guess which ones:
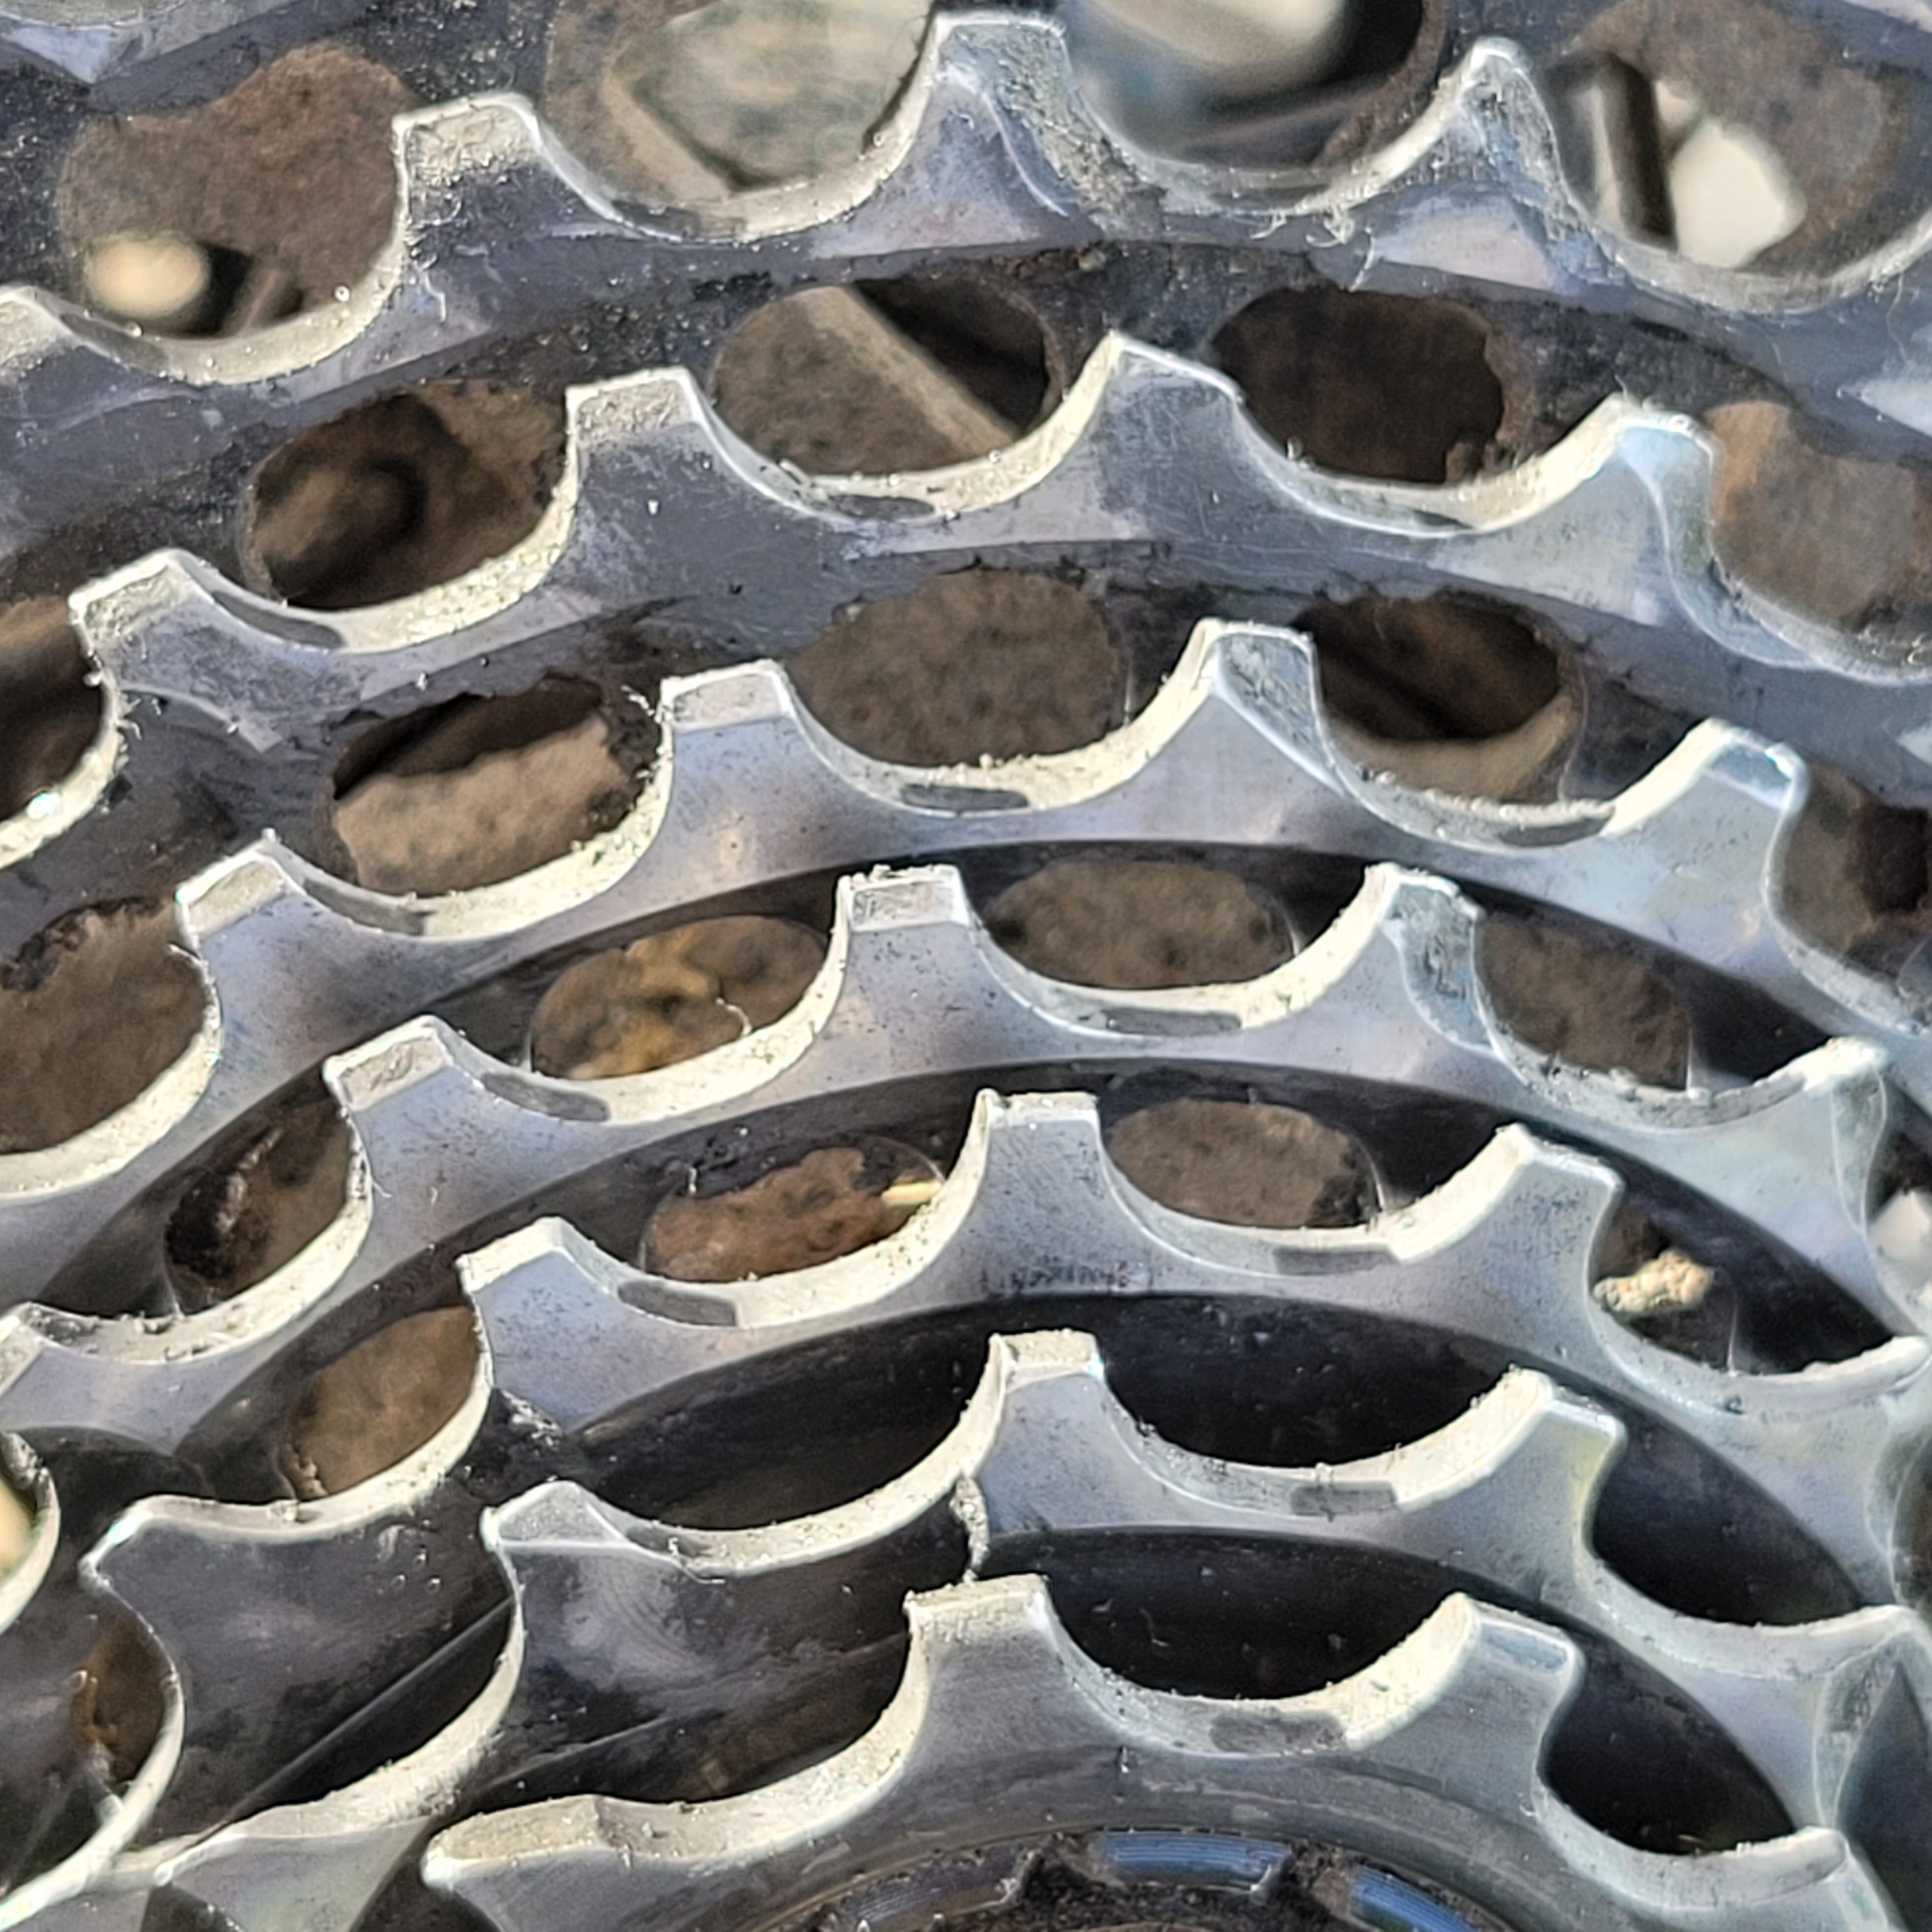
The victim of the shock example chain. Guess the affected cogs!
Back to the chain measurement: I consider everything below 120mm as really good, and I try to avoid to run a chain longer than 120,5mm (+0.8%). By the way, this means that each link is 0.1mm longer. In this state, usually the rollers are worn significantly and have a lot of play on the inner links. You may also notice that chain lube is washed out quicker.
If you use a ruler, measure 10 links = 254mm nominal length. My experience: everything longer than 255mm is not very good any more.
Still you have some risk for excessive cog wear and/or a new chain hopping over.
Other contributing factors:
- running the same few gears all the time (quite common on flat terrain)
- small cogs wear out faster (the teeth engage more often)
- cog material varies (I had to treat my aluminum climbing cog, despite it having 45 teeth)
- B-gap: if you adjust your derailleur too low, the chain wraps the cog less and is more likely to hop over.
Most of the time you will be fine with chain exchange in due time. Otherwise - grab your Dremel.
Found this helpful?
Then share widely - and let me know :-)
cog 2 and 3

AI Website Software